When Malaysia comes to mind, many would think of the famous Petronas Towers in Kuala Lumpur, street food indulgence in Penang or Malacca, or perhaps off-city places such as Tioman or Redang islands. But the beauty of this Southeast Asian peninsular is far more than its sights and tastes, it also offers the perfect getaway for a lepak (relaxed) experience that isn’t too far away from home.
With four in five Singaporeans working adults feeling burntout, the need to take a break from work has become important for a recharge. As travellers look for a way to unplug from their hectic schedules, choosing the right time to fly is also an important factor. Expedia data in May has shown that travellers are already booking trips in the second half of the year. To avoid the crowd, consider travelling to places such as Penang and Langkawi in July and September this year when you can find more affordable flight options to stretch your dollar.
For the ultimate lepak experience, here are four rustic retreats for you go on flight mode to connect with yourself and loved ones.
1. Bon Ton Resort Langkawi
Located just 10 minutes from Langkawi Airport, the idyllic resort has only eight villas in a quiet setting with a 20-minute walk from the beach. Each villa stands at about 100 years old and is uniquely designed with history and modern architecture. You can also experience modern luxury while being in touch with nature by stargazing in a bathtub or experiencing a rain shower under the trees. There is also Nam restaurant that serves fusion gourmet cuisine, with Asian spices, of course. If you are an Expedia Rewards member, you can enjoy VIP perks like welcome beverages, late-checkout or even a free upgrade[1] to make your experience even more rewarding.
Where to book: Bon Ton Resort Langkawi Address: Jalan Pantai Cenang, Langkawi, Kedah, 07000
[1] Late checkout and free upgrade at VIP Access properties are subject to availability.
2. Kunang Kunang Heritage Villas Langkawi
Kunang Kunang Heritage Villas boasts about 20 different villas that welcome you with a homely atmosphere, as well as an exceptional view of the Lagoonarium. These antique facades feature modern room amenities such as a bathtub, a private bathroom, as well as a good balcony view. Don’t forget to pamper yourself at the day spa, where you can indulge in features like saunas, steam rooms and whirlpools. Kunang Kunang is also located less than 10 minutes from Langkawi Airport, wasting no time for you to dive right into your luxury escape.
Where to book: Kunang Kunang Heritage Villas Address: Jalan Pantai Cenang, Langkawi, Kedah, 07000
3. PARKROYAL Penang Resort
PARKROYAL is perfectly parked in front of the vast blue horizon. The unblocked view of the Straits of Malacca sets a tranquil scene for you to take everything off your mind. Every room comes with a view, so you’ll never miss out scenic sunsets. There is also a spa and other wellness treatments such as facials and body therapies for you to rejuvenate. Another way to lepak would be to chill at Javana Lounge indoor, with live entertainment, or enjoy al fresco dining and have a drink while watching the sun set at Gustoso By The Beach.
Where to book: PARKROYAL Penang Resort Address: Batu Ferringhi Beach, Batu Ferringhi, George Town, Penang, 11100
4. The Banjaran Hotsprings Retreat
This retreat is tucked away near the forest, where you can be in touch with nature while enjoying a spa treatment. Your wellness is the central focus here in this rustic getaway, where you can select a range of treatments from detoxification, facial, hand and feet care, to a hair cream bath. But the real treat lies in the day pass which includes the Geothermal Hot Springs Dipping Pools, Ice Bath, Crystal Cave, and many others. If you’re looking to recoup and recover from fatigue, the Banjaran Hotsprings Retreat is perfect for your great escape.
Where to book: The Banjaran Hotsprings Rereat Address: 1 Persiaran Lagun Sunway 3, Ipoh, Perak, 31150
Don’t forget to make the best of your enjoyment when you book with Expedia. Sign up as an Expedia Rewards member to instantly unlock Member Prices of 10% off or more and many extra perks. Earn points for every eligible booking which can then be used to redeem for future trips.
Rihanna is back and more dazzling than ever, taking on the role of the new face of Dior’s J’Adore fragrance. With her effortless blend of glamour, strength, and modern femininity, Rihanna is perfectly poised to bring a fresh energy to the luxurious perfume, replacing the long-standing ambassador Charlize Theron. The transition marks a new chapter for both Rihanna and Dior, one that fans of both the singer and the brand are eager to embrace.
The Unveiling of a New Queen of Dior
On Sunday, September 1, the world got its first look at Rihanna as the new face of J’Adore in a stunning short film directed by the renowned Steven Klein. Set against the opulent backdrop of the Palace of Versailles, the film exudes the grandeur and elegance that the J’Adore fragrance has come to symbolize. Rihanna, in a glittering golden gown, commands the screen with her presence, embodying the “triumphant and free-spirited femininity” that Dior describes.
The short film isn’t just a visual treat—it’s a statement. Set to the soulful tune of Rihanna’s 2016 hit “Love on the Brain,” the one-minute video sees the superstar gliding through the palace, eventually walking on water in her heels, a scene that’s as surreal as it is captivating. As she gazes into the camera and delivers the line, “Your dreams, make them real,” viewers can’t help but feel the powerful message that Dior and Rihanna are sending out to women everywhere.
A Longstanding Relationship with Dior
Rihanna’s collaboration with Dior is not a new development. The singer has had a long-standing relationship with the brand, which dates back to 2015 when she became Dior’s first Black ambassador. She was featured in the brand’s Secret Garden fashion campaign, further solidifying her place in the Dior family. Over the years, Rihanna has been a regular at Dior’s fashion shows, making appearances during Paris Fashion Week and being a constant figure in the brand’s evolution.
Her return to Dior, especially in such a prominent role, feels like a full-circle moment. For Dior, selecting Rihanna as the new face of J’Adore was a natural choice. Her personal story of empowerment, creativity, and independence aligns perfectly with the values that J’Adore has represented for over two decades.
J’Adore: A Fragrance That Resonates
The J’Adore fragrance by Dior is not just a perfume; it’s a symbol of luxury, elegance, and timeless beauty. Since its creation, J’Adore has been a beloved fragrance, representing strong, liberated, and independent women across the globe. It’s a scent that has stood the test of time, maintaining its allure through the years.
The fragrance itself is a beautiful balance of floral and fruity notes, featuring ylang-ylang, Turkish Damascus rose, jasmine grandiflorum, and Indian jasmine sambac. It’s a composition that exudes warmth and sophistication, making it a perfect match for someone like Rihanna, whose own persona blends strength with grace.
Rihanna herself has expressed her deep connection with the fragrance, stating that J’Adore is more than just a perfume; it’s a companion, a reference point for women. Her involvement in the campaign is not just about promoting a product; it’s about bringing her world, her roots, and her creativity to the forefront.
A Visual Feast: The Campaign Film
The campaign film, directed by Steven Klein, is a visual masterpiece. Filmed at the historic Palace of Versailles, the setting alone is enough to take one’s breath away. The Hall of Mirrors, one of the most iconic rooms in the palace, serves as the perfect backdrop for Rihanna’s journey through the film.
The narrative begins with Rihanna shedding a black outfit, symbolizing perhaps a transformation or a shedding of the old. She then dons a shimmering gold gown, designed by Dior’s current creative director Maria Grazia Chiuri, and begins her journey through the opulent halls of Versailles. Each scene is carefully crafted to highlight the beauty of both Rihanna and the palace, creating a visual dialogue between the classical 18th-century style and Rihanna’s modern, contemporary allure.
As the film progresses, Rihanna’s movement through the palace is fluid and mesmerizing, culminating in the final scene where she walks on water outside the palace at sunrise. The golden hues of the gown, the lighting, and the setting all come together to create a dreamlike atmosphere, reinforcing the idea of J’Adore as a fragrance that’s not just to be worn, but to be experienced.
The Perfect Match: Rihanna and Dior
Rihanna’s collaboration with Dior and Steven Klein is more than just another celebrity endorsement. It’s a partnership built on mutual respect, creativity, and a shared vision of beauty and femininity. Steven Klein, who has worked with Rihanna before on the Secret Garden campaign, speaks highly of her, noting her remarkable ability to transcend beauty and talent, becoming a living embodiment of the J’Adore fragrance.
For Rihanna, working with Klein is a joy, as she admires his passion and dedication to his craft. The campaign is a celebration of everything that J’Adore represents: luxury, elegance, and the power of a woman who knows her worth.
A New Golden Dream
Rihanna’s role as the new face of Dior’s J’Adore fragrance marks the beginning of a new golden era for the brand. Her powerful presence, combined with the timeless beauty of the fragrance, creates a partnership that is destined to captivate and inspire women around the world. As Dior continues to evolve, embracing new ambassadors like Rihanna, the brand remains at the forefront of luxury and elegance, inviting everyone to experience the dream of J’Adore in their own lives.
With this campaign, Rihanna doesn’t just wear the fragrance; she lives it, and in doing so, invites us all to do the same. As she says in the film, “Your dreams, make them real.” With J’Adore, those dreams are golden, and they’re waiting for you to embrace them.
Join groups, start conversations, meet friends, and claim special offers in the forum. Sign up here.
Cyclists, this one’s for you! Are you ready to pedal for a cause? Join the 47th Cape Town Cycle Tour on 9 March and make an impact.
Nature Connect, anorganisation with an aim to transform lives through the power of nature, is calling on passionate cyclists who are up for a challenge and want to ride for a cause on one of the most iconic cycle routes in the world. By cycling for nature, you’ll be supporting their mission to empower communities through conservation and sustainability.
How To Join
As part of the Cycle Tour’s Cycle for a Change initiative, Nature Connect is giving cyclists the chance to fundraise for conservation and environmental education—and there are just 10 charity entries up for grabs this year!
Here’s how it works: For R500, you can secure your spot in this year’s event and commit to raising an additional R1000 by 30 March 2025. Nature Connect will support you every step of the way, helping you set up your BackaBuddy fundraising campaign, promoting it on their website, and sharing your efforts across their social media channels (@natureconnectsa).
This year’s charity spots are available for the 42km route, perfect for new cyclists, those aiming for a personal best, or anyone who wants to make a difference while riding in one of the world’s most iconic events. Spots are limited. Email Kelly at donations@natureconnect.earth to sign up.
What isNature Connect?
Since its founding in 2001, Nature Connect has provided environmental education and outdoor experiences to over 188,000 children from under-resourced communities in Cape Town, trained and upskilled over 500 youth to act for the environment, and protected Cape Town’s rich biodiversity through conservation projects.
The Cape Town Cycle Tour Prelude Challenge
Dubbed the biggest timed bike race in the world, the event attracts thousands of cyclists from across the world as they cycle some of the city’s most pristine landscapes.
As part of its ongoing commitment to inclusivity and community spirit, the Cape Town Cycle Tour has launched its inaugural 2025 Prelude Challenge. This exciting new initiative offers cyclists from around the world—who may not be able to ride on event day—the opportunity to earn their official Cape Town Cycle Tour medal and finishers’ credit.
The Prelude Challenge will run from Saturday, 22 February 2025 to Sunday, 2 March 2025, giving you ample time to complete the challenge on your terms.
To participate, register through the main Cycle Tour entry portal. Then, cycle 109km within 7 hours—whether on the road, outdoors, or on a stationary bike in a virtual environment. Once you complete your cycle, upload your ride to Strava and you’re all set!
For the past two decades, we’ve journeyed across the globe, embracing the belief that “travel is fatal to prejudice, bigotry, and narrow-mindedness,” as Mark Twain so eloquently stated. We’ve shared our adventures, our photos, and our experiences in different cultures, believing that by showcasing the beauty of the world, we could help people see beyond borders and differences.
But times have changed. The world we are traveling in now is no longer just about sharing beautiful pictures—it’s more complex, more divided, and more fragile than ever before.
Travel Used to Unite Us. Now, It Feels Different.
When we first started traveling, everything was new. Social media was in its infancy, and people were being introduced to destinations they had never seen before. Travel felt like a tool for connection—a way to experience different cultures, break down barriers, and open minds to new possibilities.
But now, we see a world that is not only more divided but also more cynical. Travel has been commodified, reduced to an Instagram backdrop rather than an opportunity for learning. Instead of sparking curiosity and empathy, it often fuels comparison, competition, and apathy. Instead of uniting us, travel content sometimes reinforces the divide between those who can explore freely and those who are struggling just to survive.
And while the world scrolls past another perfect sunset, too many people are fighting just to live.
The Reality We Can No Longer Ignore
Conflicts are raging across places we’ve visited.
Sudan is in the grip of a devastating civil war, displacing millions.
Ukraine is still under attack, with civilians suffering daily.
Myanmar’s people remain under the control of a brutal military junta.
In Gaza, entire families have been wiped out, and innocent lives continue to be lost
In Yemen, Haiti, Afghanistan, Ethiopia and so many others remain in turmoil.
And these are just the conflicts that make headlines.
The World Is Burning—Literally
We also can’t ignore another crisis unfolding in front of our eyes: Climate Change.
The places we have visited—the glaciers of Patagonia, the beaches of the Maldives, the rainforests of the Amazon—are changing, and not for the better.
Wildfires have ravaged Greece, Canada, Australia, and California, displacing people and devastating landscapes.
Floods have swallowed entire villages in Pakistan, Libya, and Germany, leaving destruction in their wake.
Coral reefs that we once marveled at while diving are bleaching and dying at an alarming rate.
The Arctic ice we once stood on is disappearing, and island nations like Tuvalu and the Maldives are literally sinking.
We’ve witnessed these changes firsthand. We’ve spoken to locals who have lost their homes. We’ve walked through landscapes that no longer exist. And we’ve realized—we can’t just keep sharing pretty pictures while pretending everything is fine.
We Can’t Stay Silent Anymore
We can’t continue to stroll around thinking everything is a dream anymore. We can’t sit in a spa, pretending all is well, waiting for someone else to say something or climb mountains for our own personal gain.
We have to speak up.
We need to talk about politics, poverty, and human rights abuses in the places we visit. We need to talk about how tourism impacts local communities and whether it helps or harms them. We need to talk about climate change, about the industries destroying our planet, and about what we, as travelers, can do to make a real difference.
We want to stand up against fascism, authoritarianism, and oppression—and help others stand up as well.
We Don’t Blame Anyone for Staying Silent—But We Can’t Anymore
We don’t blame anyone who chooses not to speak out. This is our choice alone.
For people with jobs, families, and even our fellow travel bloggers and vloggers who have partnerships, speaking out could mean losing everything—contracts, opportunities, and even their entire livelihoods. We understand why many stay quiet.
But we’re in a position where we can take that risk. And when the risk is speaking out against cruelty, corruption, and fascism—we think it’s worth it.
For nearly 20 years, The Planet D has stood for discovery—the adventure of exploring the world. But moving forward, we want it to stand for something greater:
1. Decency – Because human rights should never be up for debate. 2. Democracy – Because freedom is not guaranteed; it must be defended. 3. Determination – Because change doesn’t happen without action.
What’s Next for The Planet D
We’re not saying goodbye to travel. We’re still going to explore, still going to share guides and itineraries, and still going to help you discover the world. But we’re also going to tell the whole story.
We’ll still showcase incredible places, but we’ll also expose what’s happening behind the pretty pictures. We’ll talk about the people fighting for justice, the communities on the front lines of climate change, and the travelers and locals making a real difference.
Because, just like that hammam massage experience we once told you about—there’s always more to the story. And it’s time we start telling it.
A New Journey, Together
We know this shift might feel unexpected, but it’s the right one. Travel has always been about discovery—and sometimes, that means facing uncomfortable truths.
Thank you for being part of this journey with us. It won’t always be easy, but it will be worth it.
Jess and I are lucky enough to travel a lot, with our travels taking us to all sorts of locations and venues around the world. Whilst most of our travels don’t require us to wear formal clothing, there are sometimes occasions where we do need to dress up a bit. So I have been on the hunt for a travel-friendly suit.
I wanted a travel suit for visiting venues with a dress code, such as a fancy restaurant, opera night, or a formal cruise night. Also for those times when we just want to dress up for a special occasion such as for a birthday dinner, Christmas party, or perhaps for a formal afternoon tea experience in Paris.
I also give talks and workshops at travel and photography conferences and often wear either a sports jacket or full suit for some of those events.
We also have other events we attend, such as weddings, holiday parties, charity fundraisers, and funerals, where a suit is often required or expected. Sometimes these events are at home, but sometimes they require travel so having a suit that can travel well to a destination wedding or out-of-state funeral is nice.
What all that means is that from time to time I find myself needing a suit. Of course, when I had a job in the corporate world I had a number of suits. However, most of these weren’t suits designed for travel and required some maintenance to keep them looking sharp and wrinkle-free.
For me, a travel suit has to be something that is going to stand up well to the rigors of travel. We often travel for weeks at a time and the suit needs to survive being packed away for lengthy periods as I don’t tend to wear it all that often. I don’t want to have to worry about wrinkles in the fabric when I unpack it, it just needs to come out of the bag and go on me looking smart.
I’d also prefer it doesn’t take up too much room in my bag if possible, given that I’m not likely to be wearing it that often.
I also want a travel suit that works for most occasions, including those outside of travel, such as events and event photography. And one that will work across most types of destinations and climates. For instance an events or wedding photographer is generally expected to wear a suit to look professional and blend in with the guests.
My initial search for a travel suit started back in 2020. Over the last several years, I’ve actually spent quite a bit of time trying to find the perfect travel suit. Today I have three travel suits in different colors and have tested several others along the way.
So, without further ado, let me help you find the perfect travel suit for you, based on my experiences to date! Whether you’re looking for a good suit for business travel, preparing for a destination wedding, or you just find yourself needing to look more formal when you travel, I hope this guide helps you!
What to Look for in a Travel Suit
Before I recommend specific suits, I want to share some ideas of what to actually look for in a travel suit. This will help explain why I chose the suits I did, but will also help you pick the right suit for you, even if it’s not one I recommend.
Perhaps the two most important aspects of how a suit is going to look and wear are the type of material it is made of and the cut/fit of the suit.
For a travel suit wrinkle resistance, weight, and ease of care are also often very important. But there are a lot of other things to consider as well when choosing a travel-friendly suit, including price, color, pockets, and other features.
Let’s look at each of these.
Material
The choice of material the suit is made from is going to make a big difference when it comes to how well a suit works for travel. It’s also going to make a big difference when it comes to the price of the suit. Some materials travel a lot better than others. The main options you have are as follows.
Wool – Wool is a great natural fabric and generally considered to be the best fabric overall for a suit. It is breathable, good for various weathers, and looks refined. There are even specific wools which are woven to be more wrinkle resistant. There are a lot of wool types and names used for wool fabrics used in suits including twill, merino wool, cashmere, tweed, worsted, and flannel.
Polyester and Polyester Blends – Polyester suits are generally going to be your most budget-friendly option and most polyester suit fabrics tend to be very wrinkle resistant. Polyester also tends to be an easier care option, and some polyester options are even machine washable. The main downside to polyester is that is not a natural material and might not be as breathable as a natural fibre. It also typically doesn’t look or feel as high-end as a wool suit from up close.
Linen – Linen suits have a timeless elegance and can be an option for warm and hot weather destinations. It’s a lightweight and breathable fabric but one that wrinkles easily and is generally harder to care for and it can stain more easily. So linen suits can be a good option for some people but you have to be OK with wrinkles and a more casual look.
Cotton – Cotton is another natural and breathable fabric, like linen, that is often used in suits. Cotton can be a comfortable and affordable options, but its downsides are that it tends to have a more casual look, doesn’t drape as well, and some cotton fabrics can wrinkle easily. However, you can normally iron cotton very easily to get rid of wrinkles. Summer suits will often be made of a seersucker fabric.
Other fabric options like silks, velvet, nylon, etc. are not that common as suit materials. They are generally best avoided as a good travel suit fabric in our opinion.
Of course, you’ll also see a lot of blended fabrics out there being used for suits as well such as wool/polyester blends, linen/cotton blends, wool/silk blends etc. I would check to see which fabric is making up what percentage of the fabric and consider the pros/cons of each.
For example, some suits might use a majority of wool for the breathability, but also include a small amount of polyester blend to add stretch.
Overall, we believe the overall best material option for most people is wool, and specifically a high twist wool weave which will naturally resist wrinkles. This wool weaving process is done at the mill where the suit fabric is produced, and results in a fabric that is naturally wrinkle resistant. A good example of suits that use this type of specialty wool are the Traveller suits by Suitsupply.
For those on a small budget, polyester is probably your best bet. You can also consider polyester/wool blends which can give you a wool suit at a smaller price point with the benefits of both wool and polyester.
A great budget pick that I’ve tested is the Haggar Men’s Travel Performance suit which you can often find on sale for under $200 for both the blazer and matching suit pants!
For those wanting a machine washable suit, you’ll want to consider a harder wearing polyester suit. Most suits, even most polyester ones, are not designed to be machine washed so you specifically need to look for a brand that makes suits that are designed to be machine washed.
One brand I can personally recommend is the Gramercy suit collection by Bluffworks as these suits can be machine washed and even tumble dried on low heat!
Those looking for a more casual summer look who don’t mind wrinkles, we think linen is a great option. For instance in destinations like Italy and Greece, you see a lot of linen in the summers and it’s a great option for those types of settings.
Cotton is probably my least favorite of the above as a travel suit material. However, I do have a green blazer I got in Italy that is 100% cotton that I love. I wear it when I want to look put together but not too formal.
Color
Color is obviously a personal choice when it comes to a travel suit. We’d suggest picking a color that you like and one that will work in a number of situations. You also want to consider your skin tone/complexion and types of climates you will be wearing it in.
You may also want to pick a suit that will coordinate with any accessories you already have that you want to wear, such as shoes, shirts, and ties.
Navy, closely followed by medium grey and charcoal grey, are generally regarded as the most versatile suit colors. You can see this image matrix for a brief guide. These colors are suitable for a range of events and match well with most shoe, belt, and shirt colors.
A royal blue suit can also be a good option if you want something a bit more modern than a classic navy color. Brown and tan suits can also work and are versatile but are generally less popular than navy or grey suits.
If you are planning to use your suit strictly for more formal occasions (e.g., formal weddings, funerals, charity balls), then you might consider a black suit. However, these can look too formal for some settings and are less versatile.
Also, it should be noted that if you attend a lot of black-tie events (where a tuxedo/dinner jacket and bow tie are expected), it probably makes more sense to get a black tuxedo instead to work for those events and a dark suit in another color (such as navy or charcoal gray) for less formal events.
Other colors, such as tans, medium shades of blue, greens, creams, khaki, burgundy, etc. are also widely available but are going to be less versatile and may not work with all skin tones.
However, they may still be a good choice depending on where you want to wear it and your complexion. For instance, khaki, cream, and pastel suits tend to look better on those with darker skin.
If you are looking at linen suits, these often come in natural shades of creams and tan as well as pastel colors which are well-suited for warmer climates and that type of material. Cotton suits also tend to come in a wider variation of colors and patterns than wool ones.
While a solid color is the most versatile choice and is going to be the most timeless, you can also go with a suit with a pattern for a bolder look and to better fit your personal style.
Classic men’s suit patterns include pinstripes, checks, gingham, plaids, herringbone, and houndstooth. If you opt for a patterned suit, choosing a classic color like navy or gray can help keep it being more versatile.
If you are only purchasing one suit and don’t currently own a suit, I would generally recommend choosing a solid navy or grey suit. Generally, I travel with either a navy or gray suit. These will generally work for a pretty wide range of events from interviews and conferences to weddings and formal nights out. They also generally look good on most people.
Of course, the final decision is up to your needs and your own personal sense of style.
Cut/Fit
There are a lot of suit styles, cuts, and variations out there and looking at all the options can be a bit overwhelming, especially if this is your first suit. You’ll find lots of options regarding how the jacket buttons, linings, lapel sizes, various types of cuts, pocket shapes, button types, linings, venting, paddings, and much more.
If you are purchasing a travel suit, then you are likely buying a suit that you want to last for a long time and which you might not be wearing too often. So, you will want a suit style that is going to last for a long time and isn’t going to become dated in a few years.
For instance, imagine the 1920’s pinstripe double-breasted suits we often now associate with American gangsters and bootleggers from that era, or the disco inspired 1970s leisure suits. These are not exactly timeless designs.
As such, we’d recommend choosing a more timeless and conservative style that will likely stay in fashion, rather than anything that might be popular now but fall out of vogue in the coming years.
The key decisions you will have to make will include whether or not you want a single- or double-breasted suit, the number of buttons on the suit jacket, the size and style of the suit lapels, whether or not the pants are pleated, and whether the suit is slim, classic, or looser fitting.
Again, these are all personal decisions. However, for a timeless look we’d recommend:
single breasted jacket (although double breasted is also popular if you prefer that look)
a 2-button jacket (or three roll two, just don’t button the top button!)
a jacket lapel width that matches your body width (generally, thinner people look better with a thinner lapel, and heavier people with a wider lapel)
lapels with a notch in
choose matching pants in a classic suit trousers style such as one with a mid rise, straight or tapered legs, flat front or single pleat, plain hem, belt loops, and 2 back pockets.
a tailored/slim or classic/regular fit (a tailored or slim fit is more fitted to body whereas a classic fit is looser and more relaxed)
Whether or not you opt for slim/tailored or regular/classic fit will depend on your body shape and personal style. It’s really important that you feel comfortable and confident in your suit, so choose the style that works best for you.
Just be sure to read details of each suit’s fit as different suit brands don’t always mean the same thing when using fit terms (slim/tailored/classic/regular/relaxed/loose) to describe their suit fits.
For the suit pants, if you are buy the suit as a set you often don’t have too many choices unless you choose to customize them. But generally you just want to get a classic pair of dress pants that matches your jacket in the exact same fabric that doesn’t have any features that could really date it quickly (e.g., skinny leg, really wide legs, flared bottoms, wide cuffs/turn-ups).
When you are wearing the suit and the jacket is buttoned, it should not be creasing or pulling anywhere. Areas to check include the shoulder, chest, waist and upper back area. It should also fit well to your body shape and not have excess fabric.
If you are trying a suit on in store, then make sure to look at it in a mirror from all angles. Bring along a friend/partner or ask a store associate for advice about how well it fits.
If you purchase online or by catalog, then be sure to do the same at home and ask someone else to give you advice. Minor alterations in length and fit can be made by a tailor and are generally not too expensive, but you want the overall shape, fit, and features to be there. For more information, this is an excellent guide to how a suit should fit.
There are a few factors that affect how heavy a suit is, and these also affect how the suit performs in different climates.
First, and perhaps most importantly, the actual fabric a suit is made from will dictate how heavy the suit is.
Fabric weight is measured in grams per square metre (gsm), with lower numbers reflecting a lighter suit and heavier numbers reflecting a heavier suit.
A lightweight suit will generally be made of fabric which varies from around 150gsm to 290gsm. A midweight suit will fall between 290gsm and 360gsm. A heavyweight suit will be anything over 360gsm. These numbers aren’t fixed of course, but can be helpful as a general rule of thumb.
The fabric weight directly affects the warmth of the suit. The lighter the suit fabric, the more suitable it will be for warm weather. Conversely, a heavier fabric will provide more warmth, good for cold climates.
Naturally, the fabric weight also directly affects how heavy the suit actually is. A heavier fabric will result in a heavier suit, giving you more to carry around. If you pack light, this is definitely something to consider.
Other factors also affect the overall weight of the suit. The suit’s canvassing, lining, and padding, if it has any, can also increase the weight of the suit. A suit jacket often has both canvasing and lining. and it may also have padding in the shoulders.
If you have a choice in the amount of canvasing (a layer of material attached to inside of jacket that gives it shape) and/or lining (thinner layer of cloth that touches your body and can be used in both jackets and/or pants) for your suit, your choice will depend on how much structure you want, the climate where you plan to wear it, and how formal or casual you want your suit to be.
More canvassing and lining is best for more formal jackets, jackets worn in cooler climates, and when you want more structure. Unlined jackets are best for those wanting a lighter jacket, more casual jacket, and warmer climates. The amount of canvasing and lining can vary a lot from completely unlined to full lined. If you are not sure, there are also partial and half lined options.
For a travel suit, we’d recommend something on the lighter end of the spectrum, which will be both easier to pack and carry, and also offer versatility in a number of climates. If it is cooler, you can always wear an undershirt if necessary or opt for a more medium-weight suit. My personal preference is definitely towards less lining and padding.
Suit lining comparison
Size Inclusivity
While most suit brands do offer a wide range of suit sizes, these won’t work for everyone. While travel suits can pretty easily be sized down or made shorter by a tailor, those who need larger or longer suits may have more difficulty finding well-fitting suit options.
However, there are still a lot of options. For example, brands like Suitsupply offer sizes from XXS to XXXXL and offer regular, long, and short sizing.
You also have the option to customize the size and fit of their suits and you can give them your exact measurements. Even budget-friendly brands like Haggar offer big and tall sizes in many of their suits.
Versatility
When choosing a suit for travel, you will want to consider how versatile it is going to be. The versatility is going to come from many of the factors we’ve already discussed including style, color, and fabric weight, as well as how well it pairs with other clothing and accessories in your wardrobe.
Things to think about include:
Can you wear the suit pieces individually as well as together? Would you wear the blazer jacket with different pants for a more casual look for example? Would the pants also work well with a dress shirt to wear for work or business functions or church events?
Will the suit work for you in different situations and events? Would you wear it to a wedding, conference, holiday party, funeral, cruise, business meeting, fancy dinner, baptism, etc. Think about events you’ve been to over the past few years or have coming up, how many of them could it work for?
Does the travel suit work in multiple destinations and climates? Does it work in both cold and hot climates? Would you wear it humid as well as dry destinations? Would it fit in equally well in the places you tend to travel in the USA, Europe, Asia, etc?
Does the suit work well with other wardrobe pieces you already have? You are likely to wear a suit more often if it goes with different colored shoes, belts, bags, shirts, ties, etc.
Generally, the more versatile the suit you choose, the more useful it will be and the more opportunities you will have to wear it.
For instance, consider that you are planning a trip to southern Italy, and you choose a nice cream linen suit for your summer travels there. It can be a great option for an Italian summer trip. However, that same suit isn’t likely going to be as well suited for a business meeting in London, a fjords cruise formal night, or a New York City formal wedding.
Now if you have very different circumstances where you plan to wear a suit, you might consider budgeting for two suits that will cover all scenarios. For instance, one darker and more formal suit and one lighter and more casual suit.
Overall, pick the most versatile suit you can. I feel it is worth spending a bit more on a more versatile suit option that you can wear more often compared to a lower cost suit that is less versatile and you don’t wear so much
Wrinkle Resistance
We’d argue that one of the key criteria to look for when choosing a travel suit is how resistant it is to wrinkles and creases. Travel is going create a lot more potential for wrinkles in a suit compared to having it hanging in a closet at home. This is the case even if the suit is in a suit carrier.
Ideally you want a suit which is going to be resistant to wrinkles and creases, and this all comes down to the material the suit is made from.
Good materials which include wrinkle resistance include high twist open weave wool, as well as some synthetic materials such as a polyester blend.
Most travel-oriented suits should make it clear that they are wrinkle resistant in the suit description but do dig into the claims to see what exactly it is about the suit that validates these claims. Check reviews from customers and see if they report issues with creases or wrinkles. If your suit arrives in the mail wrinkled, that is a bad sign.
Now if you are going for a suit made of linen or cotton, then you’ll likely have to live with some wrinkles and creases. Just be sure to know if it can be ironed as needed.
Care
Travel can be tough on a suit, and you are likely going to need to get it cleaned from time to time. So, when purchasing a suit, you will want to check to see how easy it is to clean.
Can it be machine washed? Tumble dried? Ironed? Hand washed? Does it have a stain repellant? Is it dry clean only?
If these features are important features for you, then be sure to carefully check care instructions prior to any purchase.
In our experience the majority of suits are going to be dry-clean only. This is an additional expense to consider in your budget when purchasing a suit. While you’ll likely get a number of wears out of a suit and be able to just spot clean, eventually it will need a full clean.
That said, there are quite a few travel suits on the market which can be machine washed, hand-washed, machine dried, and even ironed. For lots of travelers, an easy care option is a great plus. If you are looking for this, we recommend checking out suits by Bluffworks, Ministry of Supply, and this suit by Haggar.
Even a lot of “dry clean only suits” can be hand washed and air dried if done gently and with care. My wife, Jess, is pretty good at successfully hand washing and air drying all kinds of “dry clean” only materials to save money on dry cleaning (and to avoid the chemical treatments). But do take into account it is always a risk to ignore the suit’s care recommendations.
Based on our experience, even if you have an easy care travel suit that can be machine washed and everything, you still want to treat it gently to keep it looking it best and extending its life. I would only machine wash when needed, use gentle and delicate cycles, and use low heat or air dry.
Pockets
Most suits will have a number of pockets in both the suit jacket and suit pants, and there is normally a choice in pocket style.
Honestly, this is a personal preference. The main thing is ensuring there are sufficient pockets for your needs. If you are planning on wearing a travel suit to the airport for example, a suit with pockets that zip or that can comfortably handle things like a passport might be useful when going through check in and security.
However, if you usually only wear a suit once you are in destination at an event, then the number and style of pockets may not be as important to you. Just think about what you normally like to carry with you when wearing a suit.
If you like a suit with lots of pockets, then I’d recommend checking out the Bluffworks Gramercy suit, which has 18 pockets between the jacket and pants.
Price is going to be a key deciding factor when it comes to choosing a travel suit. I would say that a good travel suit that should last the test of time will probably run you between $500 and $850 (approximately £400 to £650).
However, you can definitely pick up a more budget oriented travel suit for about $200. It might not have all the features or look quite as nice, but it will serve it’s purpose. A well fitting and tailored inexpensive suit can still look really good.
Another option if you are on a really small budget is to check out secondhand and vintage suits. If you can can score a suit of your size, or slightly larger, you can get it tailored as needed for a better fit or to update it a bit.
You can also, of course, spend much more on a suit with custom tailored wool suits often running in the $1,500 to $6,000 range.
However, I’d say most people would probably find the sweet spot of $500 to $850 will get them a good quality suit that will fulfill all their needs and last a good long time.
Recommended Travel Suits
We’re now going to go through our recommended suits for travel. First, I’ll cover the suits I personally own and travel with, which I decided upon after doing a lot of research and trying on a lot of suits.
I’ll share my picks for overall best wool travel suit, my favorite easy care travel suit, and my favorite suit for those with a small budget.
I’ll share my experiences of those suits first. Then, I’ll cover some other popular options that you might want to consider as well.
My recommendation for a wool travel suit is to choose one from the Suitsupply Traveller Suit collection. Suitsupply is a Dutch menswear fashion brand founded in 2000. The brand is best known for its use of high quality Italian fabric suits sold at a much lower price that those of designer brands using similar fabrics.
The Traveller suits are all made of 4-ply Italian wool midweight fabric and come in both tailored and classic/relaxed fits with both single and double breasted jacket options. The suits can be purchase as a suit set, or you can purchase the jacket and trousers separately. It is available in several colors.
The secret ingredient to the Suitsupply Traveller suit is the material it’s made from. Their suits are made from a specialty 4-ply Italian wool which they call “Traveller Wool”. This is a high twist wool, which is a specific way of weaving wool yarn that results in it being naturally crease resistant as well as light and breathable. They are designed for all season wear in all types of climates.
Suitsupply Traveller Suit in Navy
You can actually customize most of the suits on the Suitsupply website to use this wool if you prefer a different suit style. However, for this review I’m focusing on the standard Suitsupply Traveller suit style.
It is worth noting that Suitsupply have changed their wool yarn supplier over time. The suit I purchased in 2021 has wool made by the Lanificio F. Lli Cerruti mill, and which was branded as iTravel wool. The suit I purchased in 2024 has wool made by the Lanificio Rogna wool mill.
Both of these wool mills are long established and reputable Italian wool mills, and the fabric produced by both mills for the suits is a high twist open weave wool which is specifically designed to stand up well to the rigors of travel.The look and feel of the wool between the two suits is very similar to my eye.
Let’s look at the other details of this suit. Beyond the wool used, there are a couple of other key standard features of this suit that make it more travel friendly.
First, the main body of the jacket is unlined, which means, as the name suggests, that there is no lining on the inside part of the jacket between the wool and you. The exception is the sleeves which are lined.
If you are used to a fully lined suit this may look and feel a bit odd at first, but by leaving the majority of the suit unlined you cut down on some of the weight and it’s also easier to fold. An unlined suit is also cooler, making it more suitable for warmer climates, giving the suit more versatility.
That said, if you prefer a fully lined or half lined suit, that is available as a custom option.
The jacket suit also has a half-canvas construction, rather than a full canvas construction. This ensures the jacket keeps its form around your chest, whilst being lighter than a full canvas construction. Note that this is the default, and you can customize the suit to be either a full canvas or even no canvas (unconstructed) if you prefer.
In terms of the trousers, by default they come half lined (although this changed between my first suit and my second suit, with my first purchase being fully unlined). Again, you can choose to customize the pants to be fully lined, half lined or unlined if you prefer.
I actually own two Suitsupply Traveller suits, and they are my go-to travel suits. I purchased my first one in 2021 in navy blue, and my second one in 2024 in black. Specifically, I chose the Navy Havana suit in 2021, and the Black Havana Tailored Fit Suit in 2024.
The navy suit I actually purchased in store in their London store when I was living in the UK. I was able to try it on, buy it off the rack, and have the pants trimmed all in that same afternoon at the store. I didn’t get any customization done other than hemming the pants which were a little too long.
I have really loved that navy suit, and when I decided I needed a more formal black suit, I decided I wanted to get the same Havana suit in black. I decided to just order these online as I knew my sizes and the fit, and would just take it to a local tailor to get the pants hemmed as it is a simple and cheap alteration.
The design and material of the Suitsupply Traveller suit has changed slightly over the period between my purchases, and like everything in life, the cost has also gone up a bit.
For my second Suitsupply suit I purchased the jacket as the standard option without making any changes. Compared to my navy jacket, there are some slight differences in lapel width and the blazer came with a a 3 roll 2 button design, rather than the two button design in the original. However, these are pretty minor changes and I like both jackets pretty equally.
For the black suit pants, I did customize these. I chose to change the closure type, do a flat front, and just do a plain hem on these. The Traveller pants came as half lined in the upper part as standard and I kept that which I think is nice for more formal black pants.
Both suits have been wonderful travel suits. They are very comfortable and have stood up to weeks of being packed away at the bottom of my suitcase (or carried in the free included suit carrier bag), coming out wrinkle free and ready to go every time. I have worn them to nice dinners, conferences, business talks, afternoon teas, cruise formal nights, weddings, and more.
Overall, I have very much enjoyed my Suitsupply Traveller suits which I plan to keep wearing for years to come. I also appreciate how much they can be customized if you choose. Just note that you’ll save money if you stick to the standard features.
There are a lot of pros of the Suitsupply Traveller suit including the pure Italian wool fabric, breathability, high quality construction, four season weight, modern style, included suit carrier bag, ability to customize, and a decent price point for a pure wool suit. Some cons are that it is dry clean only and that if you want to customize it, it can really increase the price.
If you are interested and this is your first suit, I would recommend that you visit a Suitsupply store to try the suits on and get the fit and look right. You can of course still order online and customize the suits if you prefer (I did this for my second Suitsupply purchase with good results), but I think for a first time purchase an in-store visit is well worth it if there is a store near you.
Suitsupply have physical stores in Europe, Asia and the Americas, with around 150 locations to choose from. You can also purchase and customize all their suits online. You can see the full Suitsupply Traveller range here. They can also ship to most locations worldwide.
The Bluffworks Gramercy Suit is another travel suit I own and is my top recommendation if you want an easy care suit option (machine washable) and/or you want a suit with a lot of pockets. It’s also a good option if you don’t want a wool suit for any reason such as allergies.
Bluffworks has been around since 2012 and the main factor that sets it apart from almost all the other companies out there selling travel suits is that their brand is focused on travel-friendly clothing.
Bluffworks Gramercy Suit in Gotham Grey
I have found their Bluffwork Gramercy suit to be an excellent travel suit and the suit has a number of features that make it stand out from the crowd.
First, Bluffworks makes these suits out of a polyester material they call Gramercy. This is a material that they spent a long time developing to ensure it looks as close to wool as possible. I have to say that they have done a great job—the suit doesn’t have any of the shine you might associate with a polyester suit, and I think most people wouldn’t be able to tell it wasn’t wool.
However, you do still get the benefits of polyester, meaning its lightweight, quick-drying, and breathable.
Even more impressive though is that the suit is fully machine washable. You can even tumble dry it on low heat, and if you really need to, iron it. However, Bluffworks say that the suit shouldn’t need ironing as the material is wrinkle and crease resistant. This has certainly been my experience with it and I haven’t needed to iron it yet.
The other feature that sets it apart is the amount of pockets and storage in this suit. The jacket and trousers between them have 18 pockets (!), which is far more than a regular suit.
Some of these pockets are cleverly hidden, others are zippered, and there’s even one designed for your travel documents. One downside of a suit is often a lack of pockets, but the Bluffworks Gramercy has you covered on that front. This definitely makes it much more travel-friendly and the zipped and hidden pockets add some extra security.
The suit jacket is partially lined (the sleeves are unlined), so it isn’t quite a light and breathable as an unlined suit jacket (all those pockets have to go somewhere after all). So for the hottest climates this is something to think about, although it wears easily and certainly doesn’t feel heavy in the way that a more traditional lined wool suit does.
While there aren’t many colors available, they have the most poplar and recommended ones, including navy, grey, and black. I have the Bluffworks Gramercy suit in Gotham Grey, and I think it looks great. It is honestly pretty hard to tell it’s not wool, and the feel is amazing. I love all the pockets it has, and I have found it’s still comfortable in warmer climates.
Bluffworks also make a range of other travel-friendly clothes (including women’s clothing), all of which are designed to be packable, wrinkle resistant, odor resistant, and easy to care for. The Gramercy suit is their original travel suit but they also have the Presidio travel suit which has a slightly more modern and simpler look with a fully lined jacket.
I also have a Bluffworks Lenox dress shirt. A dress shirt is pretty much an essential item to wear under a suit (unless you’re a tech CEO or something), and I have found that the Bluffworks Lenox also performs really well, standing up to the rigors of travel and looking good as it does.
I think it’s a great looking dress shirt. It offers full stretch, a soft feel, is fully machine washable, and is really comfortable to wear. It has quickly become my favorite dress shirt.
I can highly recommend the Bluffworks range of clothes, they look good, are easy to care for, and won’t break the bank.
Bluffworks is based in the U.S. but ships internationally. Currently, their clothing is only sold online from their website, and you can explore their full range online here.
If you are on a small budget and the Suitsupply and Bluffworks suits above are a bit out of your price range right now, I recommend checking out the Haggar Men’s Travel Performance suit. This is a polyester travel suit that offers a very good value for those with not a lot of money to spend. You can normally get the full suit for less than $200!
I purchased the Haggar Men’s Travel Performance suit in the color Dark Heather Grey to compare it to the more expensive suits I owned, to see how it stood up. I already owned a few pairs of Haggar’s regular travel pants which I’ve always found to be very comfortable.
If you live in the USA, you are probably familiar with the brand as its been around since 1926 and continues to be a popular brand, particularly for men’s pants and suits.
Haggar Travel Performance suit in Dark Heather Grey
Overall, I found this travel-friendly suit to be very comfortable and easy to wear. I really liked how light it was, thanks to the moisture wicking polyester construction. It is lined, but it is still lightweight.
The flexible fit waistband and stretch fabric in the suit itself also made it very comfortable to wear. It is also very resistant to wrinkles and wasn’t wrinkled from shipping or when thrown in my luggage or car.
It comes in a wide variety of colors and sizes, including some short and tall size options. The jacket is fully lined and has some padding around shoulders for a more structured look. It is 100% polyester and it is dry clean only.
This suit has a lot of pros, including its low cost, fast delivery options, range of colors and sizes, and light and comfortable fit. The main downsides are that it doesn’t have the more refined look and detailing as my other suits and isn’t designed to be machine washable. However, I feel it is a very good value at the price point and I think if I got this slightly altered, it would make it look a bit more polished.
Note that Haggar makes a wide range of suits, including an easy care machine washable suit, which you might also consider as another travel suit option. This one might be a particularly good option for those who want to be able to throw it in the washing machine.
You can buy it online (including from Amazon), the brand’s website, or buy from U.S. department stores selling the Haggar brand. You can find their clothing in stores such as Kohl’s, Macy’s, and JCPenney although I purchased mine on Amazon as I couldn’t find them available in the stores we visited.
Note that Haggar doesn’t sell their clothing directly outside the U.S. as far as we are aware. If you live outside the USA and are looking for a similar option in your own country, I’d head to your local department store and see what suits they sell off the rack at the lower price points.
More Travel Suit Options
There are a great many suit manufacturers on the market, and many of them make a suit which is either specifically designed for travel, or happens to have qualities which make it good for travel.
Here are some options that we recommend you look into if our recommendations above don’t quite fit what you are looking for, or you’d just rather have some more options!
Suits are available at a wide range of budgets and in various styles and materials, so you should be able to find something that works for you.
Another travel suit to consider is the Velocity Suit from Ministry of Supply. This is constructed from their Velocity material, which is a blend of 61% polyester, 33% viscose, and 6% elastane. It’s designed to look and feel as much like wool as possible, while offering the benefits of the blended material.
The blend means the suit offers both stretch and wrinkle resistance, and it’s also machine washable and you can put it in the drier.
You can even cool iron it if you want, although Ministry of Supply says that if the suit does have any wrinkles your body temperature will be enough to even them out. Which is pretty neat. The suit jacket is partially lined.
It’s worth noting that Ministry of Supply also makes a suit called Kinetic, which is unlined and even lighter. However it doesn’t look quite as formal, with a three button design and higher lapel. If that works for you, then it is definitely worth considering as well.
If you don’t like wearing suits because you feel they are too restrictive, then the Sene Studio FlexTech suit might be for you. This suit is made with Sene Studio’s FlexTech material, which is a four-way stretch polyester which is designed to be super flexible. That means that you can move freely in the suit and not feel restricted.
There’s lot more to like about the suit. First, it’s going to be tailor made for you, which is quite a benefit especially at this price point.
The way this works is that when you go through the purchase process you will answer a series of questions about your body shape, size and weight, and FlexTech will create the suit specifically for you. If after all that it doesn’t fit, they will remake it or let you return it anyway, which isn’t always the case with a custom suit.
Now this isn’t quite as detailed as the customization on something like the Suitsupply suits, where you can specify detailed measurements for all sorts of the suit parts, but it is a step above your average suit, and is definitely appreciated at this price point.
In terms of other features, this suit can be machine washed in cold weater, but isn’t suitable for a tumble dryer as it needs to be air dried. It also can’t be dry cleaned or ironed. As it’s polyester it will dry pretty quickly, but obviously not as quickly as something that can be machine dried.
Overall, this is definitely a good option for a travel suit to consider if you want the flexibility of stretch fabric.
This suit is made from wool woven by the notable Italian weavers Ermenegildo Zegna and is notable for its crease and wrinkle resistance. It’s dry-clean only, as is to be expected with a wool suit.
The suit is lined, but you can customize it to be half lined or unlined if you prefer. You can also customize a great many more aspects of the suit, from pocket style to lapel size, although of course many customizations do add extra cost.
It’s worth noting that as well as making material for other suit manufacturers to use, Ermenegildo Zegna also make their own suits. So you can purchase a suit directly from Zegna, but just be aware the prices are significantly higher.
Brooks Brothers are a well known suit retailer with a wide range of suits to choose from. They also have a travel-oriented range of suits, known as the Explorer Collection.
These are made from a 98% wool 2% polyester blend. The wool is a lightweight wool made by the Vitale Barberis Canonico mill, which is blended with polyester. This material gives you the best of both worlds—the quality feel and performance of wool, with the benefit of a comfortable stretch fit with wrinkle resistance from the polyester.
The suits have a half canvas construction, meaning they are more lightweight than Brooks Brothers’ traditional full construction suits, allowing for a lighter suit that is easier to pack.
As they are a majority wool construction, these suits are dry-clean only. There’s also not a lot of customization available, but the price is reasonable for a wool suit.
Charles Tyrwhitt is based in the UK and was my go-to brand for shirts when I lived and worked in London. They also make a range of suits, including their Ultimate Performance Suit.
This is made from a superfine 100% 4-ply merino wool with natural stretch. It’s also crease resistant. The jacket is half canvas and lined while the pants are half lined. There aren’t any customizations available but it’s a reasonable price for a wool suit.
Armani and other Designer Brands
If you have a bigger budget, then you can dive into the world of designer and bespoke suits. Armani is probably one of the best known suit designer brands and you can’t really go wrong with a well-tailored Georgio Armani Italian-made suit.
Other well known designer brands, many of which offer custom options, include Tom Ford, Zegna, Brunello Cucinelli, Brooks Brothers, and Brioni. Just note you’ll need to do your own research on which ones are going to be best for travel as most brands don’t specifically label any of their suits as travel friendly.
For a bespoke suit, you can head to NYC, Saville Row in London, or Milan where there are lots of tailor shops offering bespoke suits made to order. Here you can design the perfect travel suit of your dreams with almost unlimited options.
However, if you are looking for a travel suit, you may find that paying a lot more for a suit doesn’t necessarily deliver a lot of added benefits other than the name brand. For instance, in a 2011 blind test conducted by the Wall Street Journal, the reviewers found “little difference in quality” between a $614 Suitsupply suit and a $3,600 Armani option.
Additional Items for a Travel Suit
The suit is going to be the main thing you wear, but you are going to need a few more things to complete the look. Depending on your style and level of formality, these might include a dress shirt, tie, tie bar, belt, dress socks, cuff links, and shoes.
There are also a few other accessories you might consider to make your travel packing easier.
Wrinkle-resistant Dress Shirt
You need to wear something under your suit, and the majority of the time for a more formal occasion that is likely to be a dress shirt.
Ideally you are going to want a dress shirt that travels as well as the suit. After all, having a beautiful wrinkle free suit isn’t any good if you pair it with a crinkled shirt!
Of course, most shirts are a lot easier to iron than most suits, but since an iron isn’t always available then a shirt which features wrinkle resistance is a good option.
I have a number of no iron cotton dress shirts which I purchased from a major UK retailer (John Lewis Non Iron Twill Slim Fit Single Cuff Shirt), which work well. You can buy these kinds of shirts at about any department store.
But my favorite dress shirt at the moment is the Bluffworks Lenox dress shirt which I think looks great and performs really well. In terms of color, white is generally an easy color that pairs well with most suits, but this is a personal preference thing of course.
Comfortable Dress Shoes
Obviously, you are going to need to wear something on your feet, and the standard choice for many occasions is going to be a pair of dress shoes. However, dress shoes can be somewhat impractical to travel with as they take up a fair bit of space for something you might not plan to wear that much.
So what you want are a pair of dress shoes that look the part, but are comfortable and versatile enough to wear all day. This is especially the case if you are hoping to only travel with one pair of shoes.
My current personal favorite dress shoes for travel which look formal are my pair of Amberjack Originals. I also have a pair of Timberland shoes which look a bit less formal but work as dress shoes in a pinch.
Amberjack make a range of leather dress shoes which are designed to look just like a formal dress shoe, but with all the comfort and performance of a sneaker. They are incredibly comfortable, and I highly recommend them. Timberland are also obviously a well known brand, and I appreciate how comfortable their shoes are for all day wear.
In terms of style and color, there are a great many dress shoe styles to choose from. The main colors for dress shoes are black, brown and burgundy. It’s important to choose a shoe color which matches your suit. As a general rule, the following applies:
Black shoes match black, grey/charcoal and navy suits
Brown shoes match grey/charcoal, navy, brown and white suits
Burgundy shoes match grey/charcoal, navy and brown suits
As I recommend navy or grey as a suit color, with black as a backup, then I’d say black shoes are going to be the most versatile, followed by brown. Both are a solid choice though.
Many travel suits, especially those made with man-made materials, are specifically designed so you can essentially stuff them into your regular luggage and by the miracle of technology they’ll come out the other end looking like they were just pressed.
That said, you may prefer to treat them with a bit more care, in which case a good garment bag might be a good idea. This is also a good option if luggage space is less of an issue, such as when you are traveling by road.
Personally I quite like the basic lightweight garment bag that came with my Suitsupply travel suit, although its only really capable of holding my suit and a dress shirt. I also have a larger more padded garment bag like this that works well for road trips.
We highly recommend traveling with packing cubes to help you improve how well organized your luggage is. Rather than a bundle of clothes that you have to dig through to find the item you want, packing cubes allow you to sort and organize your packed items for easy retrieval.
If you don’t have a garment bag, a packing cube can also be a good place to put your travel suit and shirt. This can stay in your bag until you need it.
There are a great many packing cubes on the market, which offer different features. We’d recommend getting packing cubes with a compression feature to improve space, but basic packing cubes like these will work too. It’s also a good idea to get a set of different sizes.
One thing to note with packing cubes is that whilst they help a lot with organization, they do take up more space as the cube itself takes up a bit of room. So you might want to practice packing with them prior to a trip to ensure everything fits nicely.
Tips for Buying a Travel Suit
I’m going to cover a few tips to help you buy a travel suit, to helpfully make the process smoother for you.
Measure Properly
If you are able to visit a physical suit store location or tailor, then this is going to be the easiest way to get properly measured.
If you do go to a physical store, make sure to bring along your dress shirt and dress shoes that you plan to wear with the suit so you can get the fit just right. In my experience, a good suit store will be able to provide you with these items if you don’t have them, but if you do have them I recommend bringing them.
If you can’t visit a physical store, then check the website of the suit you are purchasing. They should have detailed instructions on how to measure yourself for their suit. Take your time and get this right to avoid having to make a return.
It’s also important to note that different manufacturers might use different sizing systems, so don’t take measurements you made on one site and apply them to another site, always measure again following each suit manufacturers specific instructions.
Also be sure to take international differences in measurements and systems in mind if ordering a suit from a country based outside of your own. For example you don’t want to mix up inches with centimeters in providing your measurements!
Trying suits in a Suitsupply store
Check the Returns Policy
If you are buying a suit in person or online, you will want to check what their returns policy is. When buying in person this should be less of an issue as you should be able to get the fit right in store. However, even so, you might change your mind after the fact or decide you want a different color.
If you are purchasing online, you absolutely want to be sure there is a robust and easy returns policy in place so you can return your suit if the fit isn’t quite right, or if it’s not what you expected.
If the suit has any customization, you will want to check if this changes the return policy. Sometimes a custom-made item might not be returnable, which would definitely be an issue if it didn’t fit!
Opt for Something Timeless
If you’re like me, you might not wear a suit that often, or need a travel specific suit that often. So you want to buy a suit that is going to last a long time. In this case you will want to pick a style that is going to last the test of time.
Generally, a solid color like navy, grey or black is going to stay fashionable. Patterns and other color options can come and go in fashion, and what may be popular now might look dated in a couple of years.
Similarly, a classic single-breasted jacket, 2 button jacket with a regular lapel is unlikely to go out of style. Sticking to tailored and classic fits and the most timeless features will help keep your suit from looking dated in the future.
Understand the Power and Limitations of Alterations
Unless you get your suit custom made to your measurements, there is a decent chance your suit could fit a bit better with some small alterations. Getting your suit tailored to you will really make a suit look nicer, more modern, and more expensive.
Even a cheap suit is going to look much better if it fits your body properly and the great thing is that most alterations are fairly inexpensive.
It is good to know what kind of alteration are fairly easy for a tailor or seamstress to make and those that are difficult or not recommended. Generally you want to make sure the overall fit and style, particularly of the jacket, is good as you typically don’t want to be adjusting front jacket buttons, shoulder width, padding, pockets, or overall shape or structure.
But things that are typically easy to change are adjusting the length of jacket sleeve and pant legs, changing the hem of your pants, taking in or letting out the waist of your pants, tapering pant legs, adding/removing cuffs to your pants, and adding/changing buttons to the jacket sleeves. Other changes may also be possible depending on the structure of your suit.
If you are buying a suit off the rack or online and are between the standard sizes, you always want to size up a size. For example if you are a 31 in pants and the only options are a 30 or a 32, always go for the 32 length. You can always make the pant legs shorter but there is a limit to how much you can make them longer depending on amount of excess fabric at the hem.
Just note that while sizing up is always a better option than buying a suit that is too small, I would not recommend buying a suit that is more than 2 sizes too big. Once you get too big, the suit is just not likely to fit you well overall without some major adjustments. You would be better off paying more for a suit in the correct size even if it costs a bit more (the adjustments to a really ill fitting suit can be costly and results may not be great).
Budget for Alterations
You should add a small amount of your suit budget to tailoring as chances are you will need at least a minor alteration unless you are lucky to fit a standard size or get it made to measure.
For example, my Suitsupply suit pants came in a fixed length and I needed to get the adjusted to be a bit shorter. With the first pair I bought, I did that in store and they did it for me for a modest fee. With the second pair, I took them to a local alternations store. I think in both cases this alteration cost between $15 to $20.
Depending on the alteration, you should expect each change to cost between $10 and $30 (£8 – £25). So if you want to for instance taper the legs of your suit pants and also take in the waist, I’d budget about $40 (£30).
But you can also call your local tailor or seamstress to get your local prices before you bring in your suit, and this can also help you shop around for the best price. Just be sure to read reviews first so you don’t end up with shoddy work!
Tailoring a suit isn’t always necessary, but it can often help get the fit just right, especially with an off the rack suit. So just bear in mind that this might be an additional cost on top of your suit budget to take into account.
Further Reading
That summarizes our guide to the best travel suit for men! Hopefully you found it useful.
We also have a number of other relevant posts that we think you will find useful for travel planning.
Don’t forget to use discount code UKTRAVPLAN for 5% discount off your tour with Go Cotswolds!
Liked this episode? Have a question? Leave me a voice message
Episode 136 – Summary
In episode 136 of the UK Travel Planning Podcast, Tracy chats with Lisa Benjamin from Go Cotswolds about the top five must-do experiences in the Cotswolds. Lisa shares her insights into the best ways to immerse oneself in the region, from exploring charming villages and scenic walking trails to enjoying local food and attending unique seasonal events.
Lisa and Tracy delve into topics such as food and drink specialities, historical sites, hidden gems, and practical tips for travelling around the Cotswolds. They also tackle listener questions, providing additional insider tips and personalized advice for planning an unforgettable trip to this picturesque part of England.
Don’t forget to use discount code UKTRAVPLAN for 5% discount off your tour with Go Cotswolds!
What you’ll learn in this episode
Top 5 Experiences: Insight into the best activities and experiences to include in your Cotswolds itinerary.
Exploring Villages: Why Chipping Camden is a must-visit location and how to make the most of your time in local villages.
Outdoor Activities: Recommendations for walking and hiking routes, including the Famous Cotswold Way.
Gardens and Walking Tours: Highlights of beautiful gardens like Hidcote and Kiftsgate.
Food and Drink: Where to find the best local eats and drinks, including Jeremy Clarkson’s Diddley Squat Farm Shop and the Cotswolds Distillery.
Historical and Cultural Sites: Must-see historical sites and unique cultural events like the Cotswold Olympics and the Rollright Stones.
Practical Travel Tips: Advice on navigating the Cotswolds by public transport, car, and tours, plus tips on avoiding overcrowded spots.
UK places, foods and words/concepts mentioned
🌾 Cotswolds: The main focus of the episode described as a quintessentially English countryside with charming villages and rolling hills.
🏰 Chipping Camden: Highlighted as a favourite village to visit, known for its pubs, independent shops, and beautiful architecture.
🥾 Cotswold Way: A 102-mile national walking trail perfect for hikers.
🌸 Hidcote and Kiftsgate: Renowned gardens mentioned for their beauty and tranquillity, especially great for a scenic walk.
🍽️ Diddley Squat Farm Shop: Jeremy Clarkson’s farm shop, noted as a foodie destination.
🥒 Asparagus: A local speciality in the northern Cotswolds, especially popular in May.
🍹 Cotswolds Distillery: Mentioned for their gin and whiskey products.
🐑 Cotswold Olympicks: A quirky, centuries-old event featuring unique games like shin kicking.
🔴 Rollright Stones: A lesser-known historical site, described as a mini Stonehenge with fascinating legends.
🏞️ Batsford Arboretum and Westonbirt Arboretum: Recommended for their seasonal colours and natural beauty.
🎄 Sudley Castle Winter Light Trail: A seasonal event at Sudley Castle, known for its stunning light displays.
Related content on UK Travel Planning and London Travel Planning
Podcasts
Episode #115 – Essential Tips for Planning Your Perfect Cotswolds Adventure
Episode #107 – Exploring the Cotswolds with Lisa Benjamin from Go Cotswolds
Articles
Subscribe and review
If you have found our Podcast helpful please leave us a review! We really appreciate your support and it will help make our podcast visible to a greater audience.
Please subscribe so you don’t miss any future episodes!
Is it all Cowboy boots and sundresses? Will I look out of place in my regular clothes at the honky tonks on Broadway?
Before we visited Nashville I found a few Facebook groups to follow where people asked the most random questions. But among them were helpful ones like where to eat on Broadway, and lots of people were asking what to wear in Nashville?
Well, I’ll tell you right now – everything goes – scroll through my photos below!
You’ll see groups of girls on bachelorette weekends in outlandish hot pink usually swinging with tassels and always with cowgirl boots. They’re easy to spot as one is wearing a sash.
I’m not sure if this is a bachelorette group or just dressed for Broadway
You’ll see short shorts and rhinestones. Sundresses with boots. Guys are in jeans and T-shirts, and every musician is rocking the cowboy boots, complete with hat.
But, honestly, people are also just wearing the clothes they’d wear at home – except for those on a girls trip!
Short shorts, sneakers and boots. Anything goes in Nashville!
Scroll through my photos, so you can get a feel for what to wear in Nashville.
Oh and be warned, you’ll see so many cute boots and dresses that you may well find yourself drawn into one of the boot shops, with their two pairs for one deals, along Broadway and making a bee-line to the rhinestones.
Pro tip: Take a friend who will be brutally honest, because only she will imagine you rocking said boots back home!
There’s plenty of bling boots to choose from in Nashville!
Pick yourself up the requisite jewelry!
These babies are $419 and $469. You gotta really love them to splash that cash! (Not all are this price)
Boots and dresses. Check! Note the sashes on the girls in the back.
I crashed these girls posing for a pic!
Boots and dresses, boots and pants… that’s Nashville
I did actually buy these ones by Ariat! They were under $200.
When I started Legal Nomads as a blog in 2008, I did so so that friends and family could follow me after I quit my job as a lawyer to travel the world for one year.
Of course, one year turned into many—you all know the story by now. When the site began to grow sharply in the years that followed, I made a decision to keep it ad-free and not take any sponsored text links or advertorial. I did not enjoy reading sites peppered with ads—so I treated my community the way I wanted to be treated.
Years ago, someone once told me that was a very stupid idea, that I’d never be successful if I built my business with those kinds of rules.
Did I leave a lot of money on the table?
Definitely.
But I wanted the Legal Nomads blog to be a living tree of my experiences and adventures, without sacrificing the kinds of reading I wanted to focus on. So I wrote the way I wanted to, and shared what I found most interesting at the time.
While I am lucky to have an incredibly loyal and engaged community of readers, the downside to this choice has been that the blog has taken a back seat to other pages and projects that do bring in income. It’s been especially dormant during the last few years when my capacity to work has been extremely limited.
So after almost a full year of not posting on the blog, I wanted to update you all on what’s been going on. I realize that what I share below may not be news to those of you who get my Curious About Everything newsletter, or are Patreon members. But there is still a big group that receive neither of those, and it’s high time I gave you an update!
I’m also going to be sending out my 2022 gift guide soon, focusing on talented local artisans here in Ottawa (who also ship to the United States).
Updates, mostly in chronological order, below.
I ended up on the front page of CNN for a weekend
In 2021, CNN commissioned a piece about my spinal CSF leak and how I went from travel and food blogger to bedbound. The editor, Karla, saw an Instagram post I wrote about the work to accept what is, and how to reframe the present moment when life lets you down.
The piece was very hard to write, both physically and emotionally. I’ve said elsewhere that it felt like doing surgery on myself, carving away parts of my story that were too unwieldy to fit into the brief.
I had hoped that the piece would raise awareness for this terrible spinal condition that many people don’t even know exists. I was one of the blissfully unaware, before it happened to me. I also wanted to write something that fellow patients could potentially send to their families and feel seen by, helping them explain how painful and debilitating spinal CSF leak is.
CNN decided to put the piece on the front page for an entire weekend.
I completely lost track of who read it as my inbox exploded with comments and terrible stories of pain from people who could relate. It was an overwhelming, exhilarating week and I feel honoured that my writing was so widely read and shared.
Screenshot from CNN’s frontpage, January 31, 2022
I still receive messages from people who stumble on the piece and recognize their symptoms on it, sending them down the path to get treated for spinal CSF leak.
I’m very grateful to Karla for giving me the opportunity to effect change through my story.
Note: I received many questions about my leak story after sharing it, like why I haven’t gone for surgery, or things I wished I knew before I got a lumbar puncture. I did a special edition FAQ newsletter, and you can see answers to those questions here.
The Legal Nomads community adopted two ‘Legal Lemurs’
One day, while I was in the shower—where all good ideas derive—I decided that I would adopt a lemur from the Duke Lemur Center.
Lemurs are some of my favourite animals (behind tarsiers of course), and I regret not visiting them in their home of Madagascar before I become disabled.
Adopting a lemur seemed like a fun distraction from the gaping maw of the news cycle, and I wondered if any readers would be interested.
I took to social media with a hastily made graphic and asked if anyone else would be interested in joining in. 31 people said yes, and I sent $750 in lemur monies to the Duke Lemur Center.
In return, we adopted a Coquerel’s sifaka and an aye-aye, and receive quarterly behaviour updates about our lemurs with a lot of really cute photos.
One of our lemurs, Pompeia, even had a baby this spring.
Our aye-aye is named Agatha, and she has a very feisty personality. Her updates often involve the creative ways that she avoids going in her enclosure when she’s supposed to. (Below is a different aye-aye, Binx.)
LOOK AT THAT FACE
(For clarity, this is only a symbolic adoption; sadly there will be no actual lemurs sent our way.)
I’ll be re-upping the adoption process next February, since many of the Legal Lemur parents have already asked if we could renew again. If anyone wants to be kept updated about this eye bleach, please send me an email and I’ll keep your name in mind for next year.
I joined the Spinal CSF Leak Foundation’s Patient Advisory Panel for Research, and later in the year, their Board of Directors
Around the same time as we adopted some lemurs, the American Spinal CSF Leak Foundation announced its selections for a research board that is patient led, and helps formalize the role of patients in moving research forward.
Research is an area of hope for complex cases like me, and I joined the patient panel for research in February 2022, along with a group of other patients. We all appreciate having the opportunity to include our voice as research studies are crafted or conducted.
Later this year, the Foundation asked me to join their board of directors, and I accepted. Both the US and Canadian Foundations have been very helpful, both for me and for patients in North America generally. I am excited to continue serving the patient community, and hopefully continue to raise awareness in new ways.
I moved to Ottawa
After a year in Aylmer, in Quebec’s Gatineau region, I finally found a place for me in Ottawa. It’s near water, it’s an 8-minute drive from my brother, and it’s in a building that has thus far been very accommodating with respect to my disabilities.
Though I have now clawed back a few hours a day of ‘uptime’ with my spinal CSF leak, there is still a lot I cannot do.
Me on my 43rd birthday, in Ottawa
I have to limit lifting anything to 5 pounds and under. I can’t bend at the waist, or twist my spine. Anything that raises intrathecal pressure too much is going to risk blowing open my leak. (As will Covid, by the way, so my concern with getting it is not only my risk profile for complications with my immune dysfunction, but also that a coughing fit can take away all of this hard-earned independence.)
I do go for walks when my health allows, but doing so eats into my “standing up” budget—and means I need to make sure I’m not cooking a meal then (I’ll have a salad instead), and not standing up to write that day. Since I’m writing this post, today will not be a walk day.
Still, the slow walks I have done were absolutely beautiful, especially in Autumn. And after years fully in bed, they feel like jubilation.
Beautiful trees here!
As for the apartment: my building gave me permission to install a special device on my patio door, since the heavy glass door was not something I could open safely. It drills into the top of the patio door and allows me to press a button to open it. I also invested in electric blinds, and in a tabletop freezer. A friend gave me his old tabletop oven, and both freezer and oven sit side by side and able to be accessed at any time.
I’ll be writing a post eventually about the accessibility changes that helped make this place doable for me. But I do want to say here that it feels really wonderful to have a place to my own after so many years of roaming the world, and then living in other peoples’ houses.
Oaxaca was meant to be that for me, a home base I loved that I could eat in and soak up the joy of living in such a special city. There is peace in having a small space to my own that I could build around my limitations, even if I can’t stand up for long each day.
I am thankful for my dad and stepmum, who gave me a generous gift to help furnish the apartment. I had no furniture when I rented it, and it’s been a challenge finding pieces that are the right height, and not strongly off-gassing. Their gift allowed me to hunt for the items that worked best without scrambling.
IKEA, Facebook Marketplace, Kijiji (a Canadian Craigslist alternative) and a friend who donated his bench cushion couch to me all came in handy.
The overall result is a place with lots of furniture storage—bins and drawers and shelves—so that I can access things but not have them cluttering the counters. Because I can’t bend, it means most things have to be at waist level. There’s a lot of lower drawers that I can’t get to, but family helps me grab things if I need them there.
It’s also been really nice to bring in some of the souvenirs from my travels for the first time. The photo below is my reading corner, with art from my first trip to Asia in 2004, and a papier-mâché lady from my years in Oaxaca.
The duck is new, and delightful.
My reading nookMy standing desk nook, where the sausage gets made.
I am mostly breaking even, thanks to my community
When I became disabled, I worried about how I would support myself going forward. I did not want to be a burden on my family, but I could barely sit up let alone find a way to earn a living. Though I am privileged that my family would never let me starve, it felt very tough to not be able to support myself in my 40s
At first, my celiac translation cards were selling quite well, and seemed like a way that I could at least have some passive income to pay bills I incurred.
When Covid hit, however, no one traveled any longer — and my sales crashed to near zero.
I then started my Patreon membership, upon the urging of this lovely community who asked for it to help support my very changed life. (For those unfamiliar, Patreon is a way for readers to pledge monthly recurring memberships, in return for Patreon-only benefits.)
Many people set up their memberships with tiers that have different access. The more you pay, the more you have access to. I decided to have similar benefits across all tiers (a “support only” membership), since I was concerned my health would intervene in my ability to give the benefits my Patrons deserved. I wanted people to pledge what they were comfortable with.
Obviously, my tiers are birds. Birds with names.
Screenshot from my Patreon page
We’ve had Zoom calls with the community, I do videos answering questions (although I’ve received a lot less questions of late so less of those!), I have done some video tutorials on meditation techniques, and the Patreon community gets updates about what’s going on more frequently.
I have lost some Patrons in recent months, all citing financial issues as the reason. Understandably, as everything has become more expensive, we cut the extras where we need to. Overall, though, the Patreon provides a fairly consistent income stream at at time when I can’t work as I used to.
That means that I don’t need to chase down paid work to make ends meet, and can instead focus on raising awareness for my condition, and sitting on the Foundation’s board of directors (which is unpaid).
In 2021, my celiac cards started selling again since travel picked up. Whenever I have “uptime” available, I work on updating the existing celiac guides I have, and on working toward new ones. There are several new countries in the works, two of which that are out being beta tested now with celiac readers who will provide feedback.
Taken together, and with my food map sales (see below), I’m making ends meet.
Entrepreneurship is generally anxiety-inducing, since you never know if one month will fare well compared to the next. Adding to that, I expected that when my life changed that my audience would too. No longer able to share fun travel photos or food stories, I wondered if I’d have anyone reading at all.
I am thankful that many of you are still here.
My spinal csf leak is stable enough that I have delayed going back to Duke
I get emails each week asking why I’m not pushing for surgery, or more blood patching. I think this is one of those very personal things that many people do not understand. It was a very dramatic last blood patch, and I have to be willing to accept all the risks for me to go back.
After the CNN piece came out, I spoke with my doctor at Duke and he offered to patch me again. This is a reasonable thing, given that I was sealed for 8 months during the last patch he gave me. But I also needed an epinephrine jab on the table during that same procedure, and my immune system has gone into overdrive since.
I was also told I have a condition I’ve not written much about called adhesive arachnoiditis, where my spinal nerves are clumping together causing a lot of pain.
There are other considerations that factor in. It’s not a guarantee that the patch will work, especially as we can only use blood since I am allergic to the glue. While blood-only does work for many, with a connective tissue disorder in the mix, fibrin is more durable (pun intended), which is why they went with it for me in the first place.
So it’s a matter of accepting risks, but among them that I may end up net negative—not just that the patch may not work.
This combination of factors, along with my few hours of ‘standing up time’ a day, has led me to push out patching for now.
I have hope that the science evolves to support a better probability for my healing. There are new imaging techniques, procedures, and ongoing research for this condition. Thus far, not much has shown to be applicable to my complex case, but you never know.
I do plan to get treatment eventually, because symptoms abound. When I stand, I still get the “brain sag” feeling of my spine being smushed by my brain. I have a lot of nerve pain and back pain, and neurological issues. And I’m grateful that Duke is willing to patch again.
I am just not there yet.
The hand drawn maps of food that I designed have been selling since 2014. The plan was, and remains, to do ten countries in all.
Most of the foods Canadian think of as ‘our foods’ are colonial dishes. There were no “ketchup chips” or poutine prior to Columbus, that’s for sure. I wanted to include Indigenous dishes as well, and I reached out to the specialists in Indigenous foods in Canada both to make sure I was including a cross-section of dishes, but also to ensure the spelling was correct.
I hope it’s a more inclusive map as a result.
Food map of Canada in 12×12 format (without title)
The shop that houses my maps was stagnant since 2016, when I set up a now-defunct theme and ignored it ever since except to add new maps for sale.
Despite that, people have bought maps! And sent me their pictures of their maps all over their walls. I am also thrilled to have orders for new restaurant openings, with my map adorning their walls for the cuisine in question.
For this holiday season, I wanted to redesign the shop so it better reflect the style of the LN website, now that I’ve redone things here. I did the shop redesign myself, because I wanted to update things as I go…. So it took me awhile.
Behold! Old shop:
And, the new shop:
Yay! Check it out here. I’m still fixing some bugs, but it’s mostly done.
Phew, I think that’s everything.
Thank you for your support, and for coming along on this very unusual ride.
The Portuguese Camino from Porto has different routes; the Central, the Coastal Route, and the Litoral Way. All routes start at Se Cathedral in Porto. All three routes merge in Redondela, Spain, 85 km before Santiago de Compostela. It’s possible to combine all three routes or choose one and walk it from the start to the end. In this post, I describe the first stage of each of the three Camino de Santiago routes from Porto.
Se Cathedral in Porto is where all three Portuguese Camino routes start
For many pilgrims, the Portuguese Camino starts in Porto. The route is much longer because it starts in Lisbon. The Lisbon to Porto part of the Camino is not a very popular route.
Our YouTube video on the three routes of the Portuguese Camino from Porto
How many routes are on the Portuguese Camino from Porto?
There are 3 routes on the Portuguese Camino de Santiago from Porto; the Central Route, the Coastal Route, and the Litoral Way (Senda Litoral). The Litoral Way is the one that goes along the coast from Porto. The first stage of the Central and the Coastal routes is inland.
I walked out of Porto for 3 consecutive days following the 3 different routes of the Portuguese Camino. The Litoral Way is by far my favorite as it goes along the coast and offers spectacular scenery. It is one of our favorite Camino de Santiago routes.
The Coastal Route from Porto is my least favorite because it goes through some industrial areas and past the airport. I wouldn’t say the walk on the Coastal Route was ugly or unpleasant it was ok I just liked it the least. Especially the middle part where you walk through the industrial area and next to the airport.
The scenery on the Litoral Way of the Portuguese Camino from Porto is by far my favorite
Different routes of walking out of Porto; Senda Litoral, Coastal Route, and Central Route of the Portuguese Camino
Best places to stay in Porto before the Camino
The best is to stay near the Cathedral so on your first day on the Camino you can start the walk right from your hotel and don’t have to take the metro or a bus to get to the Cathedral first.
Albergue de Peregrinos de Porto is 3 km away from the Cathedral on the Central/Coastal Camino routes. If you want to stay there you can do the first 3 km from Se Cathedral to Albergue the day before you start your walk so on the day you can walk out of the Albergue and continue on the Camino. If you’re going to walk the Litoral Way then you’ll have to get from the albergue to the Cathedral by public transport or taxi and then start walking.
A map of the 3 routes of the Portuguese Camino from Porto. The Litoral Way (blue) is along the coast, the Coastal Route (green) is inland till Vila do Conde, and the Central Route (red) which goes inland
Which route from Porto is the best?
It depends on which route of the Portuguese Camino you want to walk. If you plan to walk the Central Route I’d suggest following it from the start. You can also walk out of Porto following the Senda Litoral, but in that case, you’ll have to switch to the Central Route in Vila do Conde which adds one extra day to your itinerary.
If you want to walk the Coastal Route of the Portuguese Camino I recommend walking out of Porto following the Litoral Way. In my opinion, it’s a more beautiful route and it makes more sense to walk along the coast from the start. The Litoral Way and the Coastal Route merge in Vila do Conde. From there they follow more or less the same trajectory. The Litoral Way sticks more to the sea while the Coastal Route sometimes goes through towns and forest.
The walk from Porto to Vila do Conde on the Litoral Way is 4 km longer than on the Coastal Route; 33 km/20,5 mi vs 29 km/18 mi. You don’t have to walk it in one day. Even 29 km/18 mi in my opinion is too much for the first day on the Camino.
As an option, you can combine all three routes. Walk out of Porto following the Litoral Way, then continue combining the Coastal and Litoral routes from Vila do Conde to Caminha. From Caminha walk to Valença and continue on the Central Route. You can add to your itinerary the Spiritual Variant of the Portuguese Camino from Pontevedra to Padrón.
What is the most scenic route of the Portuguese Camino from Porto?
The Senda Litoray (Litoral Way) is in my opinion the most scenic first stage of the Portuguese Camino from Porto. The Coastal and the Central routes have beautiful parts as well but it’s not as impressive as the Litoral Way. I especially enjoyed the last 10 km to Vila Cha which were along the coast past several beautiful beaches. There are some amazing towns to visit on all 3 Camino routes.
It’s difficult to argue that the coastal scenery on the Litoral Way from Porto is spectacular
Comparing the 3 routes (1st stage); Central Route vs Coastal Route vs Litoral Way
Distance
Central Route – 27 km/16,7 mi (Porto to Vilarinho)
Coastal Route – 29 km/18 mi (Porto to Vila do Conde)
Litoral Way – 26 km/16 mi (Porto to Vila Chã)
Total ascent/descent
Central Route – 336 m/355 mi
Coastal Route – 255 m/320 m
Litoral Way – 242 m/273 m
Walking surface
On both the Central and Coastal routes, you walk only on hard surfaces with almost half of the route being on cobbled stones which are known to be tough on your feet.
On the Litoral Way, half of the route goes on boardwalks which are easier on your feet. There are no cobbled stones on the route.
Central Route – 14,5 km/9 mi – asphalt and tar road; 12 km/7,4 mi – cobblestones; 500 m/0,3 mi – footpath.
Coastal Route – 17 km/10,5 mi – asphalt or tar road; 12 km/7,4 mi – cobblestones.
Litoral Way – 15 km/9,3 mi – asphalt; 1 km/0,6 mi – cobbled; 10 km/6,2 mi – boardwalks.
Walking on or along busy roads
Again, the Litoral Way is the winner. You don’t walk on the road at all, not even 100 m. On the Central and Coastal routes you do walk on or next to busy roads with a lot of traffic.
Wooden boardwalks along the coast that you get to walk a lot on the Litoral Way from Porto
Easy to navigate
In my opinion, the Litoral Way is the easiest route to walk out of Porto despite the lack of marking on the first 10 km from the Cathedral. It’s very straightforward. You don’t need a map, signs, or GPX. First you walk along the river and then along the coast.
On the other hand, the Central and the Coastal routes are marked but the first two kilometers through the historical center are confusing due to many road and other signs and ads in the city. It’s difficult to spot Camino signs. After the first 2 km, both routes are quite easy to follow.
Scenery
For me, the Litoral Way is by far the most beautiful first stage of the Portuguese Camino from Porto. Sandy beaches, blue sea, small villages, and wildflowers in spring months are the perfect scenery to start the Camino with.
The first 2 km on the Central and the Coastal routes through the historical center of Porto are impressive. You get to see some of the highlights of the city. On the Central Route, I enjoyed the last 5 km through a quiet rural area and the forest. The Coastal Route has its beauty too; you can see some countryside and forest.
How busy are the routes?
To me it looked like the Litoral Way was the busiest route out of Porto. I walked all three routes in July so I believe that time of the year people prefer walking along the coast. The Central Route had a decent amount of pilgrims too. On the Coastal Route out of Porto, I saw only 3 pilgrims. Mind, that July overall is a less busy month than May or September. I walked some parts of the Portuguese Camino in May and there were a lot more people than in July.
Before you start walking the chosen route of the Portuguese Camino make sure to enjoy the stunning views of the city from the lookout points at the Cathedral
When is the best time for walking?
When is the best time to walk the Camino will depend on several factors. I walked different parts of the Portuguese Camino from Porto in May, June, July, September, and October. For me even in July on the Central Route, it wasn’t extremely hot. I’d say from the weather point of view the spring/summer months between May and mid-October are the best time for walking.
July and August are the busiest holiday months in Portugal and Spain but the Portuguese Camino route on the contrary not as busy as in May, June, and September. July and August might be a good time to walk the Central Route if you want to escape the crowds. There are many festivals and celebrations in Portugal in July and August. You will likely to witness some of them if you walk the Portuguese Camino during that time.
It’s better not to walk the Coastal or the Litoral Way in July and August if you want to stay in private rooms. Most places by the sea are fully booked and the accommodation prices increase a lot during these holiday months. If you’re planning to stay in albergues it shouldn’t be a problem. It might even be easier to find a dorm bed in July and August than in May and September.
The historical center of Vila do Conde where the Coastal Route and the Litoral Way join
Where in Porto do the Camino routes start?
All 3 routes start at Se Cathedral in the historical center of Porto. To be honest I find route marking from the Cathedral confusing and not very clear.
The Central and the Coastal Route
The Central and Coastal Routes start at the stairs (Calçada de Don Pedro Pitões) across the square from the main entrance to the Cathedral. There is an official sign and a couple of yellow arrows pointing down. There is a tourist information office down the stairs on the right where you can get a map of Porto and inquire about the Camino route.
A map of the first 800 m from the Cathedral on the Central and Coastal Routes. You can see it’s quite tricky with many turns. Basically from the Cathedral get down to R. das Flores and take the first left. From there it’s easier to follow the route.
Once down the stairs keep left you’ll see two yellow arrows painted at the bottom of the wall pointing in opposite directions. I took the right route but I believe both routes end up at the same place R. das Flores, a pedestrian street. Once there it’s very tempting to follow this street but you have to take the first left turn to Rua do Ferraz. From there it’s a bit easier to follow the arrows.
If at some stage you lose the route the best will be to find Igreja do Carmo on Google.Maps and walk there. From the church (Igreja do Carmo) the route is easy to follow. You can find a yellow arrow on the wall on the right side of the church (facing it).
Note!!! There are a couple of metal planks with arrows at the Cathedral pointing right I tried to follow them but they don’t go any further than the square in front of the Cathedral.
The Central Route and the Coastal Route follow the same trail for the first 7 km from the Cathedral. At 7 km (in Padrão da Légua) they split; the Central Route goes straight and the Coastal Route turns left.
The split on the Portuguese Camino from Porto, in Padrão da Légua, 7 km from the Cathedral. The Central Route goes straight, the Coastal Route turns left.
The Litoral Way
The Litoral Way from the Cathedral goes along the river out of Porto to Matosinhos and from there continues along the coast. The easiest way of finding the route is to walk from Se Cathedral down to the river and continue along it. The route is not marked and if you try to follow yellow arrows they might lead you towards the Central/Coastal Route.
Are the routes well-marked?
All three routes are marked with traditional yellow arrows painted on the ground, walls, poles, etc. From time to time you see official route markings such as wooden or stone signs, and metal plaques on the ground.
The Coastal and the Central Routes (the first 7 km it’s the same route) are marked quite well starting from the Cathedral. The first 2 kilometers through the historical center of Porto are a bit confusing because there are many ads, cars, people, etc. You have to be careful not to miss a yellow arrow.
The first 10 km of the Litoral Way are not marked. The route marking starts at the information office in Matosinhos. From there on you can follow traditional Camino signs. Despite not being marked the Litoral Way is the easiest route to walk out of Porto. From the Cathedral you go down to the Douro River and follow it for 10 km. It’s a very straightforward route.
These colorful fishermen’s houses for me were one of the highlights of the Litoral Way
The Central Route – Porto to Vilarinho, 27 km/16,7 mi
Distance – 27 km/16,7 mi
Time – 6 hours
Ascent – 336 m
Descent – 355 m
Walking surface – 14,5 km/9 mi – tar road and asphalt, 12 km/7,4 mi – cobblestones, 500 m/0,3 mi – footpath
The first 7 km/4,3 mi the Central and the Coastal route are on the same trail.
The first 7 km on the Central and Coastal route from Se Cathedral to Padrão da Légua
For the first 15 km/9,3 mi, there are many restaurants, cafes, and shops to stop for breakfast or coffee. After that there are places to stop but not as many as in the first half.
The Central Route from Porto GPX files
To make your walk easier you can download our GPX files. The files are our courtesy and for private use only. No unauthorized public or commercial use is allowed.
If you don’t have a GPS watch you can use these files on your phone. We have a detailed post explaining how to use GPX files on your device.
PDF files of the route
The Central Route from Padrão da Légua to Vilarinho
The Central Route description
The first 2 km/1,2 mi are through the historical center of Porto from Se Cathedral to Igreja (church) do Carmo. It is the most difficult part to navigate especially the first 700 m from the Cathedral. If you lose the trail find Igreja do Carmo on Google Maps and walk there. From the church follow Rua de Cedofeida (the street on the right facing the church). From there the Camino route is quite easy to follow it goes straight to Vilarinho.
Between 2 km/1,2 mi and 5 km/3,1 mi, you walk through the residential area of Porto.
2,8 km/1,7 mi – Albergue de Peregrinos de Porto. If you’re going to stay in the Albergue and planning to walk the Central or the Coastal Route you can walk the part from the Cathedral to the Albergue a day before so in the morning you can walk out of the Albergue and continue on the Camino. Otherwise, you have to take the metro to go to the Cathedral and then walk past the Albergue.
Between 5 km/3,1 mi and 11 km/6,8 mi, the route goes through quiet neighborhoods.
6 km/3,7 mi – a couple of big supermarkets (LIDL, Continente) where you can get a well-priced meal.
7 km/4,3 mi – the split (on the left side of the street) in Padrão da Légua at the intersection of R. Nova do Seixo and R. Fonte Velha.
8,4 km/5,2 mi – a supermarket (ALDI)
11 km/6,8 mi – 12 km/7,4 mi – along the road (sidewalk) through the forest
12 km/7,4 mi – 14,5 km/9 mi – through towns along the busy roads
14,5 km/9 mi – a couple of big supermarkets (LIDL, Pingo Doce)
15 km/9,3 mi – 16 km – industrial area but not a very busy one
16 km – 16,4 km/10 mi – on a road
17 km/10,5 mi – a shop and a bar
One of the small towns on the Central Route between Porto and Vilarinho
18,5 km/11,4 mi – Mosteiro, a small town with a cafe
20 km/12,4 mi – Vila, a small town with a cafe and a shop
21 km/13 mi – 21,5 km/13,4 mi – on the road
21,5 km/13,4 mi – Gião, a small town with a restaurant. You can stamp your Pilgrim’s Passport at a stand with a stamp on the left side of the street.
22,4 km/14 mi – a small supermarket
23 km/14,2 mi – at the Doce Giao cafe there is a route split. I’d recommend following the alternative route that turns right and goes through a quiet area. The left route is on a busy narrow road it’s not a safe walking option. There is a very nice guesthouse Casa Mindela, 800 m from the Camino route. You can stop there instead of walking to Vilarinho. We stayed there for a couple of days and we liked it.
24 km/15 mi – a bar and a shop
25 km/15,5 mi – an ATM and a cafe
26 km/16,1 mi – Municipal Albergue do Mosteiro do Veirão.
26,5 km/16,4 mi – 27 km/16,7 mi – a footpath through the forest
27 km/16,7 mi – Vilarinho, a small town with a shop, a cafe, and a private albergue/guest house.
The forest on the last 500 m on the Central Route from Porto
Places to stay in Vilarinho
The Coastal Route – Porto to Vila do Conde, 29 km/18 mi
Distance – 29 km/18 mi
Time – 6-7 hours
Ascent – 255 m
Descent – 320 m
Walking surface – 17 km/10,5 mi – asphalt or tar road and 12 km/7,4 mi – cobblestones
The Coastal Route from Porto GPX files
You can use our GPX files on your device to make your walk out of Porot easier. The files are for private use only.
PDF files of the route
The Coastal Route from Padrão da Légua to Vila do Conde
The Coastal Route description
The first 7 km/4,3 mi on the Coastal Route from Porto is the same as on the Central Route. For more info on that part check the section above.
Between 7 km/4,3 mi and 9 km/5,6 mi, you walk through a very quiet neighborhood of Porto with small houses lined up along the street.
9 km/5,6 mi – 11 km/6,8 mi – the Camino route goes through a rural area.
Walking through the countryside was the best part of the Coastal Route from Porto
11 km/6,8 mi – 12 km/7,4 mi – through an industrial area with many trucks. I walked it on Sunday so it was quiet I think that on weekdays it is busy.
13 km/8 mi – a shop and a cafe
13,5 km/8,3 mi – a town with an ATM, cafe, and shop. The next place to stop for food will be at 22 km.
15,8/9,8 mi – 17,5 km/10,8 mi – walking next to Porto Airport
21 km/13 mi – 22 km/13,6 mi – a quiet road through the forest
22 km/13,6 mi – a big shopping mall (Vila do Conde Porto Fashion Outlet)
24 km/15 mi – Mindelo, a small town with a shop and a cafe
26 km/16 mi – a shop, a cafe, and a bar
29 km/18 mi – Vila do Conde
The historical center of Vila do Conde for me was the highlight of the Coastal Route from Porto
Places to stay in Vila do Conde
The Litoral Way (Senda Litoral) – Porto to Vila Chã, 26 km/16 mi
Distance – 26 km/16 mi
Time – 5-6 hours
Ascent – 242 m
Descent – 273 m
Walking surface – 15 km/9,3 mi – asphalt, 10 km/6,2 mi – boardwalks, 1 km/0,6 mi – cobbled
The first 10 km/6,2 mi on the Litoral Way from the Cathedral in Porto to Matosinhos are not marked. It doesn’t mean it’s difficult to find the route in fact the Senda Litoral is the easiest route to follow out of Porto. From Se Cathedral get down to the Douro River and follow it till you are out of the city.
The route from the Cathedral to the river described in Brierley’s guidebook is the shortest way but you don’t have to follow any trail just walk to the river and continue along it towards Ponte da Arrabita (Arrabita Bridge) and the Atlantic Ocean. Mind, the guidebook says to follow orange arrows but, there are no arrows maybe there were in the past.
As an option, for the first 5,5 km/3,4 mi, you can take the famous yellow tram (#1 and #18). It pretty much follows the same route as the Camino. Passeio Alegre is the name of the tram stop where you get off.
For the entire 26 km/16 mi, there are plenty of cafes and restaurants to stop at.
The first stage of the Litoral Way from Porto goes along the coast from the start to the end
The Litoral Way from Porto GPX files
You can download our GPX files and use them on your device to make navigation easier. The files are our courtesy. No unauthorized public or commercial use is allowed.
The PDF files of the Litoral Way
From the information office in Matosinhos, the Litoral Way of the Portuguese Camino is well-marked
The Litoral Way route description
For most of the first 6 km/3,7 mi, you walk next to the Douro River except for a short part just before Jardim do Passeio Alegre. You don’t have to worry about finding the way just follow the same street and it will take you back to the river.
6 km/3,7 mi – São João Baptista da Foz Fortress and Barra do Douro Lighthouse
The beautiful promenade on the Litoral Way between Porto and Matosinhos
10,5 km/6,5 mi – Tourist Information Office in Matosinhos. From there the Litoral Way is well-marked with traditional yellow arrows and official Camino signs. Some pilgrims take a bus/metro train from Porto to Matosinhos and start walking from there. Bus #500 and metro line A go from Porto to Matosinhos.
10,5 km/6,5 mi – 13 km/8 mi – the Camino goes through the city (Matosinhos). It is the only part of the Litoral Way where you have to pay attention to the Camino signs.
11,7 km/7,2 mi – go over the bridge Ponte móvel de Leça to the other side of the river. From there walk back to the coast.
13 km/8 mi – the information office where you can get a stamp. They told me there that you can buy a Credential (Pilgrim’s Passport) at one of the newspaper (tabaco) kiosks nearby. If you still don’t have it you can inquire there and buy your Credential on the way.
From 13 km/8 mi you walk along the coast to Vila Cha. There are plenty of cafes and restaurants and some supermarkets along the way.
15 km/9,3 mi – the beginning of the boardwalks. From there on you walk almost entirely on boardwalks.
20 km/12,4 mi – a big supermarket (ALDI, 400 m away from the boardwalks)
24 km/15 mi – Labruge. There is a private albergue 900 m away from the Camino route.
26 km/16 mi – Vila Cha. The municipal albergue in Vila Cha is about 800 m away from the coast and the Camino route.
Places to stay in Vila Cha
Vila Cha is a beautiful small beach town with a public albergue, a perfect place to stop on the first day of the Portuguese Camino
Portuguese Camino from Porto planning resources
Questions or Comments?
Got any questions or comments? We would love to help! All questions and comments will be answered by us personally in Buy Me a Coffee. Click below and ask away.
Feel free to support our site by buying us a coffee!
The pretty half of Stingy Nomads, responsible for all our land adventures (hiking, climbing, walking the Camino) and following them write-ups. Alya loves walking since she was a child, she prefers to walk 1000 km with a backpack rather than to do a 10 000 km road trip (actually any road trip). Alya is a big fan of Latin America, the Spanish language, and dancing. Every time we go away she desperately misses our dog Chile.
The way I see it, Tokyo can be a separate country on its own given how massive it is. That being said, keep in mind that going from one place to another within this urban city can often take 30 minutes to an hour — or even more! (Always check Google Maps to verify your travel times).
With that in mind, even if it is humanly possible to go to ALL of the attractions listed below per day for your Japan itinerary, it’s best that you don’t because you will definitely be running around. This is why I suggest that you pick out the top spots that you really like and then save the rest for later or for other days (in case you have more days in Tokyo).
The Tokyo Metropolis is composed of 23 special wards and the city’s top highlights are found in only a few numbers of these wards. For ease of discussion, I will divide Tokyo into two: the west and the east. Below are the west’s top attractions…
SHIBUYA. This is referred to as a major nightlife area but it’s also a major shopping and entertainment venue especially because of its strong youth presence in fashion and culture.
For attractions
★ Shibuya Crossing: Found in front of Hachiko Exit, this is arguably the most prominent landmark of the district and the most filmed spot in the area. If you want to get a good view of it, go to the QFRONT building where a big Starbucks cafe is found. It’s best to come during rush hour to see an impressive sight but be prepared for crowds inside the cafe. Nevertheless, if you want more of a higher bird’s eye view, go to Shibuya Hikarie shopping mall’s Sky Lobby on the 11th Floor.
Hachiko Statue:Hachiko is the name of an admired Akita breed dog in Japanese culture back in the 30s who exemplified superb loyalty to his owner even after his owner’s death. Up to this day, Hachiko has been remembered for these amazing traits and that’s why this bronze statue of him that was put up in 1934 in front of Shibuya Station remains to be a well-revered point in Japan.
ALTERNATIVE: If you want less of the crowd, there’s a bigger statue of Hachiko along with his master, Professor Ueno, at the grounds of UTokyo or the University of Tokyo. .
For quirky fun
Karaoke: You must NEVER leave Japan without trying a typical Japanese karaoke! If you’re not from Asia, karaokes are not like the ones that you see in Europe or the USA where the person goes on stage and sings in front of strangers in a bar as they sing along to the song on TV — NO. Asian karaokes are more personal and ‘closed’ so you can unleash your singing powers in a sound-proof room with people that you actually know. Of course, these Japanese karaoke rooms are high-tech and are even well-decorated depending on the place you go to (and yes, they have English songs — some of them even have Filipino tracks).
Love Hotel Hill: This is where you can find the biggest concentration of love hotels in Tokyo, and though it’s not a typical item on a ‘things to do in Tokyo’ list, it can be an amusing thing in itself especially if you’re traveling with your loved one — largely because of how the rooms are delightfully themed. Just be warned though that some love hotels don’t accept same-sex couples or even two foreigners. Nevertheless, you can ‘rest’ in a room for 1-4 hours at around 1,500 yen ($15~) per hour or ‘stay’ in a room overnight for as low as 7,000 yen ($68~). .
For nightlife: Two of the most brilliant clubs would first be the mammoth super club ageHA with over 4 dance floors, an outdoor pool, and an outdoor dance tent; and second, the laser-filled Womb club with its identifiable giant mirror ball. Better yet, get this Tokyo Nightclub Pass that grants you UNLIMITED entry to the top 7 nightclubs in Tokyo! .
For shopping
★ Don Quijote, Loft, and/or Tokyu Hands: These shops are great to include in your Japan itinerary if you’re looking for cheap souvenirs, novelty items, stationaries, and more!
Center Gai, Koen Dori, Spain Slope, and/or Shibuya 109: The first 3 are distinct shopping streets in Shibuya, whereas Shibuya 109 is a complex that you don’t want to miss out on if you want to do some serious shopping!
Shimokitazawa: This nearby district is a great ‘bohemian’ spot if you’re looking for vintage and second-hand items and clothes. .
For food
Ichiran Ramen: A famous ramen (noodle soup dish) place that gained popularity worldwide because of its solo booth style of dining. Rest assured, the ramen tastes superb here and is worth a try so jot this down on your Japan itinerary!
HARAJUKU. Famed for its fashion scene, quirky culture, cosplay shops, and so much more!
For attractions
Meiji Shrine: Dedicated to the deified spirits of Emperor Meiji (1st emperor of Japan) and Empress Shoken, the vast Meiji Shrine is a great tranquil ‘escape’ from the hectic Harajuku. As a visitor, you can partake in the routine Shinto acts: buying amulets, writing out your wish on an ema (wooden plates), and making offerings at the hall. For proper behavior when visiting a shrine, you can read this guide.
TIP: If you want to witness a traditional Japanese Shinto wedding in which they make a procession to the temple, head here around 10AM and try your luck!
Yoyogi Park: A typical meeting place for Japanese people from all ‘walks of life’. Since it’s just near the trendy Harajuku, you will normally find crowds of band members, lolitas, cosplayers, and fashionistas in interesting clothing (they’re sometimes concentrated around Jingubashi or the bridge near Meiji Shrine). Taking photos of these people in fancy clothing is perfectly fine, but it’s best if you ask for permission first since not all of them are there to please the crowd — they’re usually just there to hang out or do practices, etc. .
For shopping
★ Takeshita Dori: The birthplace of Japan’s fashion trends, this is a narrow street that’s filled with captivating shops and cafes. It’s an extremely sought-out place in Tokyo (especially by fashionistas) so it can get very crowded here, especially on weekends. Some of the things you shouldn’t miss out on for your Japan itinerary? The entrance — take a photo here as you see yourself reflected on the screen.
TIP: Wanna do a guided tour? Take this Harajuku half-day tour that will take you through Takeshita as well as grant you access to some of the district’s top cafes!
Cat Street: If you want to stray away from Takeshita Dori’s crowd, this is the next best place to be.
Omotesando: If Paris has Champs-Elysees, Japan has Omotesando. If Takeshita Dori is more for low to mid-level shoppers, Omotesando is more for the older or wealthier shoppers.
TIP: Drop by Espace Luis Vuitton Tokyo which is found on the top floor of its building to find an amazing art space — not to mention that the bathrooms are really fancy.
Daiso Harajuku: This is one of Japan’s famous 100-yen variety-store shops that offer affordable housewares, toys, stationery, decorations, bento supplies, gifts, and more!
Tokyu Plaza Omotesando Harajuku: This is a multi-story shopping center that recently became even more popular because of its kaleidoscope-like entrance that’s made of dozens of tilted mirrors. Don’t miss out on this for your Japan itinerary, as well on its rooftop terrace area on the 6th floor if you want views over Harajuku. .
For quirky fun
Maison de Jullieta: Kawaii (cute) culture is a ‘thing’ among the Japanese and one of those kawaii fashion styles would be the sweet lolita look. In Maison de Jullietain Harajuku, you can dress up as one — complete with costume, makeup, and hair arrangement at a price of around 10,000 yen ($97~)!
Kawaii Cafe: In line with Harajuku’s colorful splash of colors and eccentric atmosphere, there exists the Kawaii Monster-themed cafe! With over 5 separately themed areas, the cafe is like a rainbowholic’s paradise where every corner is filled with kawaii decoration and Instagram-worthy scenes.
★ Purikura: Purikura runs like a photo booth — but ‘leveled up’ in a Japanese kind of way and it’s widely popular among females. Through these machines, you can take photos of yourself or your friends in a studio-esque booth; after which, you will be digitally enhanced. By that, I mean automatically Photoshopped in a kawaii manner: bigger eyes, whiter skin, and narrower face.
SHINJUKU. As a major city center, Shinjuku has the busiest train station in the world (Shinjuku Station), it houses the administration center for the Tokyo government, and holds a plethora of amazing things to do in Tokyo!
For attractions
Tokyo Metropolitan Government Building: Towering at 243m, this structure has two towers and each of these has an observatory which visitors can visit for FREE in order to get a bird’s eye view of Tokyo. I recommend the southern tower since it shows a better ‘side’ of Tokyo (closes at 5:30PM), whereas the northern tower is best for night shots since it closes later into the night (until 11PM).
Shinjuku Gyoen: Best visited during sakura and fall season for your Japan itinerary, this place is just a stone’s throw away from Shinjuku station and it is surely one of the city’s largest and most favored parks. Here, you will find three different gardens, a traditional Japanese landscape garden, a French garden, and an English landscape garden.
Samurai Museum: As a Japanophile, I have also been enchanted by the culture and history of the samurai (or bushi) — Japan’s notable military warriors. Adults can enter for a fee of 1,800 yen ($18~) in order to see the impressive exhibits; but the highlight of this place is probably the experiences that you can try: photoshoot with basic samurai gear (500 yen $5), sword battle performance with an actor (free), samurai calligraphy lesson (500 yen or $5~), and professional photoshoot with full samurai gear (starts at 32,000 yen or $320~). .
For nightlife
Omoide Yokocho: This is commonly called “Piss Alley” but rest assured, it is not as disgusting as it sounds. Based next to the train on the west side of Shinjuku Station, this is a place that’s almost similar to Yurakucho near Ginza — except that Omoide Yokocho features more varied tiny eateries that serve ramen (Japanese noodle dish), sushi, kushiyaki (skewered grilled meat), among many others. The shops predominantly only speak Japanese; but as a foreigner, it’s not hard to just point your order to them.
TIP: Book here for a guided tour so you don’t miss out on anything!
★ Golden Gai: Made up of a network of 6 narrow alleys connected with even smaller passageways, Golden Gai is a fascinating site to go to for a drink. With over 200 tiny bars and eateries, it can undoubtedly provide you with a glimpse of Tokyo’s past. However, don’t let the looks of these bars fool you; though they are small (fitting only around 5 customers), the prices are not exactly cheap. After all, they typically serve well-off clients such as celebrities, musicians, artists, etc. But don’t back out just yet because even if most bars only welcome their ‘regulars‘, you as a foreigner can still get to experience the glory of Golden Gai because there are those who welcome non-regulars — this is best signified by the English menus that they would display outside their bar. (Take note that these bars don’t open until around 9 or 10PM).
TIP: For your Japan itinerary, book here for a guided tour so you don’t miss out on anything!
Kabukicho: This is the entertainment and red-light district in Shinjuku which is sometimes called the “Sleepless Town”. Unlike Amsterdam which features prostitutes on the windows of their buildings, Kabukicho has a more subdued collection as it only includes hostess clubs, love hotels, massage parlors, and more. Unless you want to avail these kinds of services, as a regular tourist, I just find this as an interesting place to see in Tokyo. Rest assured, I felt entirely safe walking around here since it didn’t feel seedy. Truth be told, one particular thing about Kabukicho that I best liked to see or observe was the pachinkoparlors. (Pachinko is an insanely popular game in Japan that somehow resembles pinball and since gambling is illegal there, this is the only way that locals can ‘gamble’.) .
For quirky fun
★ Robot Restaurant: Tokyo, the land of the weird (as some would say) lives up to its name because it does offer several themed restaurants like that of The LockUp (prison-like), Zauo (fish for your own food), and Alice in Wonderland Restaurant(self-explanatory). But the most entertaining and bizarre-themed restaurant I’ve visited? That would be Robot Restaurant in Kabukicho area. A structure of glitz, lasers, and robots, my ‘ordeal’ in this restaurant was… undescribable — in a good way!
Godzilla: Japan’s famous giant monster and pop culture icon, Godzilla, can be seen here in Shinjuku atop Toho Cinemas. It’s a nice spectacle to see for your Japan itinerary because he looks like he’s taking a peak from the building above — seconds away from wreaking utter havoc.
Animal Cafes: Plenty of people would recommend that you go to Tokyo’s well-liked animal cafés such as those of a cat café, owl café, rabbit café, goat café, etc. (There are lots of them found around Shinjuku such as Cat Cafe Calico, etc.). I don’t like them though because I’m uncomfortable with the idea of keeping multiple animals in such a small space with strangers that they’re not that accustomed to — but, I leave it up to you to decide what you would do.
ASAKUSA.This is said to be the center of Tokyo’s shitamachi (“low city”) — which means that it’s an ‘olden’ district where you can get a feel of how Tokyo was in the past decades.
For attractions
★ Senso-ji Temple and Asakusa Shrine: Take note that a shrine is dedicated to the Shinto faith, whereas a temple is dedicated to Buddhism. These two places are the main highlight in Asakusa with Senso-ji being the oldest temple in Tokyo. There is also an impressive “Thunder Gate” called Kaminarimon (which is a symbol of Asakusa and Tokyo) in front of the temple.
Sumida River and Park: For a leisurely stroll, go over to Sumida River and lounge by Sumida Park which stretches on both sides of this body of water. Like what you’d expect, there are cherry blossoms here that come alive in spring, and then during July on its last Saturday, this becomes a great spot for viewing the Sumida River Firework. (If you see a golden building with an odd golden structure on top that looks like a teardrop, that’s the Asahi Beer Tower with its ‘Asahi Flame’.) .
For activities
★ Kimono rental: This is your chance to try on Japan’s elegant traditional wear: a kimono! Putting on a kimono can be VERY intricate, but don’t worry because there are rental shops spread out throughout Japan (catered both to men and women) that let you wear it outside for a day for a price that starts at 3,000 yen ($25~).
Samurai Armor rental: You can take a step further and rent to wear Japan’s famous traditional warrior’s (samurai’s) armor! If you book this activity online, you can even have a professional photographer take photos of you.
Rickshaw ride: To complete your kimono look, I recommend that you rent a traditional Japanese rickshaw which will take you around key spots in Asakusa.
Tea ceremony: Highly influenced by the principles of Zen Buddhism and a well-respected hobby, the Japanese Tea Ceremony(also known as the ‘Way of the Tea’) is a traditional cultural activity that is elaborate and refined, and in which matcha or powdered green tea is prepared and drunk by a host.
To be frank with you, this is a very long ceremony where you will sit motionless for hours as you follow a set of guidelines… but it is a striking example of Japan’s amazing culture that is exceptional for immersing one’s self with. For a good place to try this in, go here.
Hanayashiki: If you’re up for it, this is said to be Japan’s oldest amusement park (built in 1853). .
For food and shopping
★ Nakamise shopping street: Stretching about 250 meters from Kaminarimon to the main grounds of Sensoji Temple is this picturesque shopping street with over 50 shops that offer local specialties and the usual array of tourist souvenirs.
Shin-Nakamise: Also called as “New Nakamise”, this runs perpendicular to the Nakamise Shopping Street and is lined with various shops and restaurants.
Asakusa Kagetsudo: This is a famous melon-pan store that has been running since 1945. Melon-pan is basically a sweet baked bread with an outer layer that looks like a melon — so it’s just named that because of its appearance and not because it tastes like a melon. When you buy from this store, it is best to eat it when warm.
AKIHABARA. Dubbed as the otaku* cultural center and tech shopping district of Japan, walking through Akihabara’s main street called Chuo-dori will already give you an idea of what this district is all about. *Japanese term for people who have obsessive interests commonly towards anime and manga. A synonymous word in English would be ‘geeks’.
You see, Japan may have an amazing olden culture, BUT it has also developed an equally amazing modern culture over the recent years, and it is in Akihabara that you can get a glimpse of this somewhat wacky ‘evolution’.
For quirky fun
Maid cafe: A lot of people in Tokyo love to cosplay — a form of roleplaying where people wear costumes to represent a character (often found in animes and mangas). One of the good ol’ favorites of the Japanese when it comes to cosplaying or ‘dressing up’ is waitresses dressed in those frilly Victorian maid costumes. In line with their ‘character’, they will even act as if they’re servants and then treat others as their masters. Now apply that idea to a café, splash it with small games, a cutesy demeanor, brief performances, and picture-taking with customers and that’s where you get the famed maid cafes of Japan. A great place to try in Akihabara would be @Home Cafe.
★ Arcades: We have tons of video game arcades in the Philippines — HOWEVER, they’re not as insanely amazing, bright, exciting, and numerous as what Tokyo has! One of the most known gaming arcades in Tokyo would be Taito Station. (You could also do purikura inside these arcades).
★ Go Kart: Come live on the edge and explore downtown Tokyo in a cool Go Kart while you’re dressed in popular cosplay costumes! With this fun driving tour, you can opt to do a one-hour experience or a whole day affair. .
For shopping
Yodabashi: If you have time to visit only 1 tech gadget store in the district for your Japan itinerary, then this 9-story building is your best bet! After all, it is proven that their items are usually cheaper than in Europe or even Asia.
Mandarake or Tokyo Anime Center: Mandarake, a gigantic 8-floor complex that is full of merchandise related to anime and manga, is the best go-to space if you’re a hardcore otaku or at least a knowledgeable one at that; whereas I believe that a visit to the Tokyo Anime Center is best done first by people who have no idea of the otaku scene in order to gain a better understanding of it.
SUMIDA. The most noteworthy attraction that you should visit in this ward would have to be the following:
Tokyo Skytree: At 634m, this is the tallest tower in the world. It is primarily a television and radio broadcast site for the Kanto Region; but for travelers, you can visit the large shopping complex, aquarium, and planetarium that are located at its base. And of course, for sky-high views of the city, Tokyo Skytree has two observation decks and you can purchase your tickets here.
★ Ryogoku: If you are curious about Japan’s national sport of sumo (wrestling), then you must head to this place which is its so-called historic center. You can find here Tokyo’s sumo stadium (Kokugikan), sumo stables, and other sumo-related attractions. If you want to watch official matches, come around January, May, or September and book your ticket online.
Try chanko nabe in any of the restaurants in the neighborhood. This is basically a hot pot dish that is a staple food of sumo wrestlers.
TIP: To reserve your sumo tickets for Japan’s Tokyo Grand Sumo Tournament, go to this link. For the months wherein tournaments are not held, you can get a close-up look at the sumo wrestlers’ morning fight practices via this tour.
It’s time to check out Mt. Fuji or ‘Fuji-san’ (it’s how the locals commonly call it) for your Japan itinerary.
As the country’s tallest peak, it has been considered one of the most iconic sights in Japan so it would be a good idea to dedicate this day to it. There are several ways for seeing this active volcano in all its glory (including riding a Tokaido shinkansen from Tokyo to Osaka if you sit on the right, 40min before Shin-Fuji Station, or going to Fuji Subaru Line 5th Station) but below are the best locations for viewing it.
Some people do one of the places below as a day trip, while others as an overnight trip to also experience staying in a ryokan (traditional Japanese inn). It’s totally up to you, but naturally, if you’re short on time, making it a day trip would be enough.
Clouds often block the view of Mount Fuji so you often have to consider yourself lucky if you get a clear view of it. It is said that visibility tends to be better during the colder seasons of the year than in summer. Otherwise, it’s great in the early morning or late evening hours compared to the middle of the day.
★ Hakone: (1hr from Tokyo) This is part of the Fuji-Hakone-Izu National Park and it is famous not only for its natural beauty and lake views of Mt. Fuji but also for its hot springs (onsen). Other attractions that you can check out here are the: huge scenic torii gate by the lake, Owakudani (sulfurous vapor rivers), Hakone Shrine (the area’s most famous Shinto shrine), Hakone Tozan Railway (scenic mountain railway line), and Hakone Ropeway (great views over the active Owakudani valley).
To save up on transportation costs, get a Hakone Free Pass to gain unlimited travel on eight transportation options including the Hakone Sightseeing Cruise (Pirate Ship), Hakone Tozan Train, Hakone Tozan Bus, Hakone Tozan Cable Car, and Hakone Ropeway.
For a hassle-free experience, you can take a Hakone day tour that already includes a stop at Mt. Fuji and some other interesting activities like a lake cruise and more. Or, you can also do this other Hakone tour. .
★ Fuji Five Lakes: (2hrs from Tokyo) The Fuji Five Lakes is a region that lies at the northern base of Mount Fuji and among them, Lake Kawaguchiko is the easiest to access with a lot of interesting things to do. This is a great inclusion to your Japan itinerary especially if you also want to try out a typical Japanese onsen (given that it’s a hot spring resort town). Don’t forget to also try the Kachi Kachi Ropeway for panoramic views of the area.
For a hassle-free experience, you can take a Mt Fuji day tour to this lake region with the inclusion of Kachi Kachi Ropeway, fruit picking, and fruit picking.
A different option is to rather go to Chureito Pagoda (pictured above) which is still part of Fuji Five Lakes but not found within Lake Kawaguchiko. This spot is a favorite among photographers, especially during spring or autumn and it’s easy to see why! (This tour includes this pagoda as a stop).
For other options and details, you can read my Mt. Fuji tour post!
Kamakura: (1hr from Tokyo) Apart from offering great views over Mt. Fuji, Kamakura is also well known for its Great Buddha bronze statue that towers at around 11 meters. If you’re into nature, this coastal town also has great hiking trails and beaches. Not to mention that it holds numerous temples and shrines like the famous Hasedera Temple and Hachimangu Shrine.
Enoshima: (1hr from Tokyo) This is a touristic island that offers a variety of attractions (Enoshima Shrine), beaches, parks, an observation tower, and caves (Iwaya Caves). If I say so myself, doing a Kamakura + Enoshima day tour would be ideal if you want to check out both of these towns. .
Fuji Shibazakura Festival: (2hrs from Tokyo) This is a famous time-limited event that is usually held at Fuji Motosuko Resort from the middle of April to late May. If you have the time, I recommend doing a sakura tour of this festival as it features over 80,000 blooming shibazakura (pink, red, and white mountain phlox flowers) over 6 acres of sloping hills. Pair this off with a great view of Mt. Fuji and it instantly becomes an Instagrammable spot!
– – –
◘◘ Day #4 — Other Day Trips Outside Tokyo
Below are other interesting day trips that you must see near Tokyo!
★ Nikko: (2hrs from Tokyo) As a town found at the entrance to Nikko National Park, it is most famous for its Toshogu Shrine which is elaborately decorated. Other than this, due to its mountainous terrain, sights like the Kanmangafuchi Abyss (walking trail through a gorge) and Shinkyo Bridge (sacred bridge leading to Nikko’s shrines) are a must to do for your Japan itinerary.
TIP: For a hassle-free experience, you can do a Nikko day tour that includes several stopovers. .
Yokohama: (1hr from Tokyo) This is Japan’s second-largest city and it has one of the world’s largest Chinatowns. A lot of visitors also tend to include Yokohama in their Japan itinerary because of its Cup Noodles Museum and Ramen Museum. Otherwise, Yokohama’s waterfront is a sight to see if you just head to the city’s park.
Kusatsu: (3hrs from Tokyo) This is a sound trip to make if you want to visit one of Japan’s most famous hot spring resorts. In fact, Kusatsu Onsen is blessed with large volumes of high-quality spring water which makes it popular among locals and tourists alike. You will love the atmosphere here as you find almost everyone wearing yukata/kimono on the streets. Otherwise, when winter comes, the town becomes a great ski resort to visit. .
Chichibu: (2hrs from Tokyo) This city is a great place to escape if you want to get away from Tokyo’s bustle. After all, its forested mountains provide impressive nature views and hiking opportunities. One of the most sought-after events here though is its Chichibu Night Festival in December and its Hitsujiyama Park in Spring (for its beautiful pink moss park).
Naturally, there’s more to Tokyo than the sights I’ve mentioned on days #1 and #2 above. So in order to fill up your Japan itinerary with other activities for your extra days in the capital, below are some considerations that you can make.
WEST OF TOKYO.
Roppongi Hills
Mori Tower: As the centerpiece of Roppongi, Mori Tower is primarily an office building; but its lower floors are filled with more than 200 shops and restaurants and its top floor has an observation deck that will give you a glorious view of Tokyo that’s open from 10AM to 11PM (1AM on Fridays and Saturdays).
Below Mori Tower, you will find a giant spider sculpture called Maman which means ‘mother’ in French. This is made by the artist Louise Bourgeois.
Tokyo Midtown is yet another building that you can go into if you’re up for more shopping and entertainment.
During Christmas, head to the area in Mori Tower that faces Keyakizaka Street in Roppongi Hills to see a great view of Tokyo Tower being illuminated by the street lights. Whereas if you go to Tokyo Midtown, you will find the Starlight Garden which has over 280,000 lights that are magically spread out on the grounds!
★ Tokyo Tower: At a height of 333 meters, this is like a replica of the famous Eiffel Tower. Made after Japan’s post-war rebirth, this used to be the country’s tallest tower — until Tokyo Skytree was made in 2012. Despite this fact, the tower’s prime location is still a splendid place to see a panoramic view of the city. There are 2 observatories here: the main one at 150m high and the special one at 250m high. The entrance is at 900 yen ($9~) for the main observation deck and 1,600 ($16~) yen for both decks. To book your tickets, go here.
Nightlife: Clubs and bars in Roppongi can be a dizzying encounter for a first-timer; so it’s actually preferable if you visit this with a local. Otherwise, just a bit of advice: avoid the men (generally African men) who would try to push you into going to their clubs! More often than not, those are seedy ones, and later on, they might even overcharge you. For the best clubs to go to, I suggest Jumanji55, V2 Tokyo, or Club Brand Tokyo which all have a good mix of locals and foreigners. Better yet, get this Tokyo Nightclub Pass that grants you UNLIMITED entry to the top 7 nightclubs in Tokyo! .
Hie Shrine: You don’t need to travel all the way to Kyoto for your Japan itinerary to witness a Shinto shrine with multiple iconic red torii (traditional Japanese gate) because you can find this right in the heart of Tokyo! (Otherwise, there’s also a similar one called Nezu Shrine).
EAST OF TOKYO.
Marunouchi: Chiyoda is referred to as the political center of Tokyo and it is here in Marunouchi where you will see the aforementioned government institutions.
Imperial Palace: This is the main residence of the Emperor of Japan and it’s actually a massive park surrounded by moats. It contains buildings including the palace, private residences of the Imperial Family, offices, museums, and more.
★ Chidorigafuchi: Located just at the northwest section of the Imperial Palace is this moat section. This area is highly recommended during sakura season as it is one of the best spots for hanami (cherry blossom viewing). To add: they regularly light up the trees at night during that period and then you can even rent boats there!
Tokyo Central Railway Station: This is the busiest railway station in Japan in terms of the number of trains per day and it’s quite a sight to see! For starters, you’ll instantly find this building because of its red brick appearance — a look that survived from when it was first opened in 1914. .
Odaiba: As a man-made island, it was originally built to protect the city against possible sea attacks; today, however, the island transformed into a futuristic business and residential area.
DiverCity Tokyo Plaza: This is a dining, entertainment, and shopping complex which also features attractions related to the famous Gundam anime series. Truth be told, it also has a life-size Gundam statue in front of its building.
Fuji TV Area: This is called such because of how the Fuji TV Building (one of Japan’s biggest TV stations) towers above everything else. As a visitor, you could definitely go into Fuji TV’s observatory deck that’s located in the circular portion of the establishment. Other things to see around here would be the shopping mall of Decks Tokyo Beach and the scenic Rainbow Bridge (which looks dashing at night, and where you can also find a replica of the Statue of Liberty.)
Palette Town: If you’re up for some serious entertainment and shopping spree activities, I suggest that you head on to Palette Town! Here, you can find the following venues: Venus Fort (a mall that looks like a European town), Toyota Mega Web (car showroom where you can test drive cars), and Leisureland (a large gaming complex).
TeamLab: Yet another Instagrammable attraction, this interactive museum is well-known for digital and light art, and to book your tickets, just go here.
The Soho: This is an Instagram-worthy office building that’s famed for its color-blocked hallways.
★ Oedo Onsen Monogatari: If you can’t afford to go to a hot springs resort town, this is the next best thing for your Japan itinerary! This is basically a hot spring theme park that emulates the atmosphere of the Edo Period. You can enjoy various types of indoor and outdoor baths, restaurants, massages, games, and other entertainment while wearing a yukata (traditional Japanese wear). To reserve tickets for this, go here.
★ Tsukiji Market: Fish is a big business in Japan and the Tsukiji Market is a marvelous point for observing this lively industry as well as tasting its fresh produce. To date, this market has been divided into two, one of which is still found near Tsukiji Shijo Station and the other near Odaiba. If you want a guided day tour here, book an experience here. .
GINZA: Tokyo’s most famous upmarket shopping, dining, and entertainment district.
★ Yurakucho: Yurakucho is a striking yet relaxing contrast to the nearby upscale Ginza district, mainly because of its traditional-looking restaurants that are built beneath the train tracks of the JR Yamanote Line — called Gado-shita (which literally means: below the girders). As a visitor, I assure you that one look at Yurakucho will make you feel as if you’ve taken a trip back in time during Japan’s early postwar period! Nowadays, a lot of Japanese salarymen have made this location their favorite dining place after work as they flock to izakaya (Japanese-style bars highlighted by their red lanterns called akachochin) and yakitori (grilled skewered chicken dishes) restaurants.
TIP: Make the most of this area’s local flavors and drinking spots by doing a ‘Tokyo After 5‘ tour!
Chuo Dori: As the main shopping street in Ginza, you will find here all the major brand shops, department stores, and restaurants possible. Come nighttime, you will definitely be feasting upon its blinding yet beautiful neon lights. Some of the notable buildings here would be of the Wako (that has the iconic Hattori Clock Tower), Hermes, Dior, and Zara among many others.
If you want the best ‘festive’ experience on this street, I suggest walking through here on weekends from 12PM to 5PM (until 6PM from April to September) because it is customarily closed to automobile traffic — an event known as ‘Pedestrians’ Paradise’.
Depachika: This is a combination of the words depato (department store) and chika (basement). In Japan, most of the big department stores such as that of Mitsukoshihave their basement floor made into some sort of food market — but actually, if I have to describe it myself, I will call it a ‘food theme park’ because you can get to have a fun yet quick introduction into the VAST variety of Japanese food there — including square watermelons and insanely priced strawberries! Anyhow, the stalls are very generous with giving away samples too; so if you’re on a budget, you really don’t have to buy something (though it will be respectful to do so, naturally).
OTHERS (NEAR TOKYO)
★ Disneyland and DisneySea: For some good ol’ fun with your family and/or friends, check out Tokyo’s popular Disneyland and DisneySea for your Japan itinerary. You can visit both theme parks but it’s best to dedicate 1 day to each place. If you can only visit one, I personally think that DisneySea would be a great choice because it is one of its kind in the whole world!
Sanrio Puroland: Enter the kawaii world of Japan’s famous Sanrio characters comprising Hello Kitty, Gudetama, Melody, and so many others! It’s primarily geared towards kids, but if you’re a Sanrio fan, this theme park is ideal for people of all ages! I’m a huge fan of Gudetama and I fell in love with this place instantly.
Ghibli Museum: This is the animation and art museum of Miyazaki Hayao’s Studio Ghibli which is one of the country’s most famous animation studios that produced world-known movies like Princess Mononoke, Spirited Away, and My Neighbor Totoro.
Kyoto Itinerary & Side Trips
Kyoto used to be the capital of Japan — nevertheless, it has retained that former glory with its great historic value alongside countless temples, shrines, gardens, imperial palaces, and traditional wooden houses among many others.
If I may add, this is also the city that is well known for its formal traditions most especially that of the geisha (or geiko) who are Japan’s famed professional female entertainers. For these reasons and more, this is important to include in your Japan itinerary.
Looking for top sakura locations in Kyoto?
Check out this ultimate guide to Kyoto cherry blossom spots — from lesser-known locations to the most popular ones!
Take note that it takes around 3 hours by bullet train (shinkansen) to get to Kyoto from Tokyo. With that said, the ‘things to do’ for this day of your Japan itinerary should be fewer, but depending on your arrival time, it’s still possible to do a lot. Go and pick from my suggestions below…
Nijo Castle: Also called Nijojo, this is the former residence of the first shogun (military dictator) in the Edo Period during his stays in Kyoto. Today, this castle is divided into 3 areas: the Honmaru (main circle of defense), the Ninomaru (secondary circle of defense), and the gardens. What’s great about the castle grounds too is that there are over 400 cherry blossom trees so it is quite a sight during the spring season. (Admission is 600 yen).
Nishiki Market: Known as “Kyoto’s Kitchen”, this is a long yet narrow shopping street that features over 100 lively shops and restaurants. This is a great spot to visit for your Japan itinerary if you want to buy any fresh produce or Kyoto specialties. As a market with a long history, this is also a great place to mingle with the locals.
Kyoto Imperial Palace: This great expanse used to be the residence of Japan’s Imperial Family until 1868, when the capital was moved to Tokyo. Given that this is within the Kyoto Imperial Park, it makes for a leisurely stroll to go through the space which is full of ponds, gardens, and weeping cherry trees. (Admission is FREE).
Manga Museum: If you’re fascinated by Japan’s manga (comics) culture and history, this could be a quaint stopover for your Japan itinerary. Sometimes there are even artists who set up exhibits and offer sketches or portrait drawings of the visitors. (Admission is 800 yen).
★ Fushimi-inari: This is a Shinto shrine in Kyoto that you absolutely must NOT miss for. your Japan itinerary! As one of the most important shrines in southern Kyoto, it is widely popular for its dense red torii gates that number in thousands. Basically, it snakes around the trails and the main buildings up until it leads to the forest of Mount Inari (the hike takes about 2 to 3 hours but you’re free to walk anywhere). Also, as the name states, this is dedicated to ‘Inari‘ who is the Shinto god of rice. Inari’s messengers are said to be foxes and this is why you’ll find a lot of fox statues around the shrine. (Admission is FREE).
For a hassle-free experience, you can do a guided Fushimi-inari tour that includes a Sagano Train ride and a visit to Arashiyama.
Pontocho: This is a dining area that’s packed with restaurants offering a wide range of choices from local to foreign cuisines. Take note though that most establishments open from around 5PM to 11PM only. If you come in the warmer seasons, most of the places build temporary platforms over the river for open-air dining (called kawayuka).
TIP: If you want a hassle-free experience for your Japan itinerary, you can take a guided Kyoto morning tour or afternoon tour to key places in the city.
Time to make full use of this day in exploring Kyoto’s other important sights!
In my opinion, though it is possible to do all of the sights below in one day, it’s still a good idea to pay heed to the time especially if you plan to do a Kyoto kimono rental too because it will lessen your hours of exploration (given that putting on a kimono takes some time).
★ Higashiyama District: Found along the slopes of Kyoto’s eastern mountains is this preserved historic district which proves to be a great way to experience the feel of ‘old Kyoto’. You’ll definitely find a lot of shops and restaurants that will cater to your fancy!
Kiyomizudera: This is a famous temple in Kyoto that’s listed under the UNESCO World Heritage and it is best known for its wooden stage that stretches out to the hillside as it offers great views over the cherry and maple trees below it — so imagine how the site will be like during spring or autumn! (Admission is 400 yen).
Kiyomizu-michi: This is the name used to refer to the main street in the district. One particular shop you must not miss is Nama-Yatsuhashi which makes the most popular Kyoto Sweets.
Other streets to check out in the district are Sannenzaka / Sanneizaka and Ninenzaka.
★ Kinkaku-ji: Lauded as the ‘Golden Pavilion’, this is — indeed — a structure that’s mostly covered in gold leaf. This Zen temple actually used to be the retirement villa of a shogun. Today, you would absolutely enjoy its impressive architecture as it overlooks a picturesque pond. Before leaving, don’t forget to go through the gardens and check out Sekkatei Teahouse to enjoy some matcha tea and sweets. (Admission is 400 yen).
Ginkakuji: On the other hand, though this is referred to as the ‘Silver Pavilion’, it’s not really in silver — it never was. Many believed that it garnered its name after the building was built to contrast the Golden Pavilion. Either way, this remains to be a popular spot for many.
Philosopher’s Path: This is a pleasant stone path (near Ginkakuji) that is a must to visit during cherry blossom season. Its name was derived from Nishida Kitaro, one of Japan’s most famous philosophers, who used to practice meditation while walking this route.
★ Gion: This is Kyoto’s most famous geisha district and it is filled with traditional shops, restaurants, and ochaya (teahouses) in which geiko (Kyoto dialect for geisha and maiko [geiko apprentices]) work. Apart from the charm of this place, a lot of visitors come and visit with the hope of glimpsing a geiko or maiko — however, not a lot of people know that oftentimes, what they will witness are tourists who are just dressed up as one(to learn more about this, read my post here).
Hanami-koji Street and Shirakawa Area: The most popular places within Gion, so don’t forget to wander around here.
★ Gion Corner: Ideally, one of the ultimate experiences in Kyoto is to dine with a maiko or geiko, but since this is often expensive and exclusive, the next best thing you can do to ensure that you witness a real maiko or geisha is to visit Gion Corner. Aimed at foreign visitors, this place offers cultural shows that introduce traditional Japanese arts such as the tea ceremony, ikebana, bunraku, Kyogen comic plays, and maiko dances.
Shijo Avenue: Bisecting Gion district is a popular shopping area that sells local souvenirs and gifts.
Gion Matsuri: This is the festival of Yasaka Shrine and it is said to be the most famous festival in Japan! Therefore, if you happen to be in Kyoto in the month of July, you’re in for a treat because they celebrate during the whole month (with the highlight being July 17 as they do a grand procession of floats called Yamaboko Junko).
TIP: Wanna join a guided tour to the geisha districts for your Japan itinerary? Click here!
Kimono rental: Much like Tokyo, Kyoto has a lot of kimono rental shops too. If you only have the budget to do one kimono experience, I highly recommend doing it in the unique atmosphere of Kyoto than in Tokyo’s Asakusa! Another option is to do an oiran (courtesan) rental or photoshoot at Studio Esperanto.
Arashiyama is particularly popular during the spring and autumn season — nevertheless, it’s a year-round destination due not only to its close proximity to Kyoto but also to its natural setting! In order to make the most of your Japan itinerary, don’t forget to check out the following Arashiyama highlights…
Bamboo Groves: I’m sure you’ve seen photos of this place and it is famous for a reason: it really makes for a nice scenic walk or bicycle ride! If you happen to have the budget to rent a kimono in this area as well, then it is a must to take photos on this path. To avoid the crowd, I recommend coming in the early morning.
Togetsukyo Bridge: Translated to ‘Moon Crossing Bridge’, this is an iconic landmark within Arashiyama due to how it is backdropped by the forested mountains. There is even a park by the river which is speckled with cherry trees.
Monkey Park Iwatayama: The entrance to this park is found south of the Togetsukyo Bridge. Be wary that it’s a bit of an uphill climb — but which only spans for about 10 minutes. In this place, you will love the fact that there are over a hundred monkeys roaming freely in the open area. I particularly loved my experience here as I also fed the monkeys from a designated area. To add, this is also a great vantage point for panoramic views over Arashiyama. (Admission is 550 yen).
The center of the district is quite compact so I suggest taking your time strolling around. Other places of interest that you can check are Tenryuji Temple and Saga-Toriimoto Preserved Street. (Want a guided Arashiyama tour packaged together with Nara for your Japan itinerary? Check out this tour. Otherwise, you can also just take a half-day tour that will only focus on the top sights within Arashiyama.)
Or, you can also do this other Arashiyama tour from Kyoto with a Nara stopover for your Japan itinerary.
If you still have some more time, there is an option of doing the Sagano Scenic Railway which is a sightseeing activity on an old-fashioned train. Most people usually take a guided tour for this which is partnered together with a tour around Arashiyama. If not, you can just simply buy a one-way ticket.
Got some more time for your Japan itinerary? Check out these other places…
★ Daigoji Temple: A designated UNESCO World Heritage Site that is hugely popular especially during autumn or springtime due to its picturesque surroundings. Sure enough, with its beautiful grounds, landscaped gardens, hiking trails, and so much more, it instantly makes for a worthy destination for your Japan itinerary.
Toji Temple: This is yet another one of Kyoto’s many UNESCO World Heritage Sites and what’s notable about this temple is its 5-storied pagoda which is said to be the tallest pagoda in Japan.
Shojuin Temple: This has risen to popularity among young females in Japan primarily because of its Instagrammable heart-shaped window called an ‘inome‘ window in its guest hall. What’s more, the temple’s ceiling has beautiful pieces of splendid patterns. (Admission of 400 yen).
Osaka Itinerary (including Nara)
Osaka has the 2nd largest metropolitan area after Tokyo and as a part of the Kansai region, it is best known not only for its grand shogunate castle but also for its nightlife and street food. Truth be told, this is a quintessential stop for your Japan itinerary!
For your Japan itinerary, take note that it only takes about 1 hour by train to get to Osaka from Kyoto. After you check in to your Osaka accommodation, venture out on a day trip to the nearby district of Nara (which only takes less than an hour). If you’re not up for that, you can interchange this with day #10.
Nara is the first permanent capital of Japan, after which it was moved to Nagaoka, later to Kyoto, and then to Tokyo. Today, this district is famous for its historic treasures and adorable deer park.
★ Nara Park: This is a large park in the center of Nara and it is home to more than a thousand wild free-roaming deer. In the Shinto religion, they are considered messengers of gods and Nara made them as a symbol of their city. Just be wary though because the deers here can be aggressive (especially when it comes to food), but they’re generally calm. If you want to feed them, deer crackers are sold all over the park at a low cost.
TIP: Try bowing down to the deers and oftentimes, you will find that they bow back! It is said that back in the olden times, the locals bowed down to them as they were (like I said) regarded as messengers of God. For generations, they have retained this Japanese custom especially when they expect some food.
★ Todaiji Temple: Found adjacent to Nara Park, you’ll first enter this temple’s towering Nandaimon Gate with fierce-looking statues that represent the Nio Guardian Kings. This is followed by the main hall, the Daibutsuden (Big Buddha Hall) which is the world’s largest wooden building housing one of japan’s largest bronze statues of Buddha.
Horyuji Temple: This is one of the world’s oldest surviving wooden structures and a designated UNESCO World Heritage.
TIP: It’s possible to take a guided tour to Nara from Osaka (with a stop to Arashiyama included in it too). Alternatively, if you want to focus on this city only for your Japan itinerary, you can also just take a focused Nara tour.
If there’s still time, head on over to the nearby Mount Yoshino — even more so if you’re in Japan during its sakura season. Besides, this is regarded as the country’s most famous cherry blossom spot given the 30,000 cherry trees found on its slopes! Truth be told, Mount Yoshino together with the nearby Mount Koya and Kumano have been designated as a cultural UNESCO World Heritage Site since 20014.
Wanna stay a night or more? Check out these top best hotels in Nara grouped from budget to luxury places to stay.
For this part of your Japan itinerary, t’s time to explore Osaka’s top wonders, namely…
★ Osaka Castle: An iconic Japanese castle that played a major role in the unification of the country during the 16th century. Nowadays, however, the castle tower is entirely modern on the inside (even featuring an elevator) but its historical features are still intact. (Admission of 600 yen).
Beside it is the Nishinomaru Garden with over 600 cherry trees with an admission of 200 yen.
Umeda Sky Building: This is a spectacular 173-meter tall building that consists of 2 towers that are connected by a ‘Floating Garden Observatory’ on the 39th floor.
TIP: Don’t miss out on the cool photo opportunities on the long escalator that leads to this observatory! In the basement of the building, you’ll also find a restaurant floor that emulates the early Showa Period of Japan.
★ Minami (Namba): This is Osaka’s most famous entertainment district offering the following landmarks…
Dotonbori: This is an immensely popular street that runs parallel to the Dotonbori canal. In here, you’ll find a wide array of shops, restaurants, food stalls, karaoke, and more! Make sure that you visit here at night because it is when it really comes alive! Another spot you must not miss here is the famous Glico Running Man sign and the gigantic Kani Doraku crab sign.
If you see a long line, don’t hesitate to line up too because most of the time it means that it’s a pretty good place! (Of course, if you don’t mind waiting).
Shinsaibashi Shopping Arcade: This nearby area is Osaka’s premier shopping center that combines retail stores, boutiques, department stores, etc.
Hozenji Yokocho Alley: This narrow path has a number of interesting restaurants and izakaya (informal Japanese pubs) that are somewhat reminiscent of Kyoto’s Pontocho alley.
Shinsekai: If you want a less crowded version of Dotonbori, this is the place to go to for your Japan itinerary. Notable here is the Tsutenkaku Tower (the symbol of the district) and the kushikatsu (an Osaka specialty of various battered deep-fried foods)
Are you rather looking for a fun and quirky way to explore Osaka? Then come and join a Go Kart experience and race through the city!
– – –
◘◘ Extra or Substitute Activities in Osaka
Got some more time for your Japan itinerary? Check out these other places…
★ Universal Studios Japan: This is the first Universal Studios theme park that has been built in Asia. Now, if you ask me, out of all the USJ parks I’ve been to all over the world, this one in Japan blew me away! With over 8 gigantic sections (including the Wizarding World of Harry Potter), there is more than enough to keep you entertained!
Hirakata T-SITE: This is a commercial complex near Hirakatashi Station that has beautiful architecture. Inside it is the famous Tsutaya Bookstore which has over 150,000 books and which also has become a recent hit on Instagram for its charming interiors.
Osaka Aquarium: This is an incredible aquarium that displays over 15 tanks, each representing specific regions of the Pacific Rim. For instance, the central tank that represents the Pacific Ocean is 9 meters deep and is home to a whale shark which is the main attraction of the aquarium! (Reserve your tickets here).
Hiroshima Itinerary & Side Trips
This is the city that was largely destroyed back when an atomic bomb was dropped over it during World War II. Great efforts were taken to rebuild the city and today, Hiroshima is well known for its aspirations of tranquility with its Peace Memorial Park and if I must say so myself, this is a must for your Japan itinerary.
Please take into account in your Japan itinerary that it takes more or less 3 hours to get to Hiroshima from Osaka. Once here, below are landmarks that you can include on your…
★ Peace Park: This is one of the key features of the city and at a large scale of over 120,000 square meters, this used to be the commercial and political center of Hiroshima before the bombing. After that horrific event, the park now holds vast gardens and various structures such as…
Peace Memorial Museum: Comprises of 2 buildings that go through the history of the city and the events that happened after the nuclear bomb. When I visited here, most of the exhibits were upsetting — and for good reason because they wanted to serve as a reminder of how we should never take peace for granted.
A-Bomb Dome: This is what remains of the former Prefectural Industrial Promotion Hall. When the bomb exploded, this is one of the few buildings that still stood and remains so today. (This is also a listed UNESCO World Heritage Site).
Cenotaph: This is an arched tomb dedicated to the A-Bomb Victims who died. Underneath it is a stone chest that holds the register of their names that number over 220,000. On the anniversary of the bombing, a ceremony is held at the park every year along with an observed silence at 8:15AM (the exact time of the bombing).
Hiroshima Downtown: This is a bustling downtown area with Hondori Street as its main feature. As you venture about this place, do try the city’s specialty which is the Hiroshima-style okonomiyaki — a delicious savory pancake containing various ingredients.
Hiroshima Castle: This was destroyed by the atomic bomb in 1945 but it was rebuilt and nowadays, it holds exhibits about the castle’s history as well as Japanese castles in general.
TIP: If you don’t intend to stay a night in Hiroshima, you can take a day tour to this city — which will already include a trip to Miyajima. (Starting points for your Japan itinerary can be from either Kyoto or Osaka).
Just a 1-hour ride away by train and ferry from Hiroshima is the small island of Miyajima. It’s particularly famous for its giant torii gate that seemingly floats on the water during high tide — making it one of Japan’s best views. Most people do this as a day trip for their Japan itinerary but you could also stay overnight to experience a ryokan (traditional Japanese inn).
★ Itsukushima Shrine: This centuries-old shrine is known worldwide for its iconic ‘floating’ torii gate that is built over the water. From the Shinto shrine itself, you will find that it has various buildings including a prayer hall, main hall, and noh theater stage.
If you want the best view, be mindful of the timings of the tides during your visit. High tide is obviously when it is most picturesque, but the low tide has its charm too because then you can walk up to the gate and see it up close.
Mount Misen: Rising at 500 meters, it offers spectacular views over the island and even toward Hiroshima. Apart from the ropeway, you could also take one of the 3 hiking trails that lead up to the mountain namely…
Momijidani Course: shortest but also the steepest and goes mostly through the forest.
Daisho-in Course: offers the nicest views and is not as steep as the other two.
Omoto Course: any of these 3 hiking trails takes about 1 to 2 hours to reach the summit.
Daisho-in Temple: Found at the base of Mount Misen. There is an interesting Buddha ritual here wherein as you walk up the temple steps, you spin the metal wheels with inscribed sutra as it is believed to have the same effect as reading them.
Omotesando: This shopping street is the busiest place in Miyajima where you can find souvenir shops, food stalls, and restaurants. Why not do some shopping here while doing your Japan itinerary!
TIP: If you don’t intend to stay a night in Hiroshima, you can take a day tour to this city — which will already include a trip to Miyajima. (Starting points for your Japan itinerarycan be from either Kyoto or Osaka).
Other Destinations & Trips
Obviously, there is more to Japan other than the famous destinations of Tokyo, Kyoto, Osaka, Nara, and Hiroshima. So if you have more days on your Japan itinerary, consider filling it up with any of the following destinations!
TIP: For a complete list of amazing tours and activities to do for your Japan itinerary, see here!When booking, use code AILEENKLOOK to get 5% off!
◘◘ Day #13 and Onwards
(My favorites are marked with a ★).
NORTH OF JAPAN.
★ Hokkaido: With magnificent unspoiled nature, Hokkaido is a haven for a lot of outdoor lovers, most especially during wintertime as it is a great place for skiers and snowboarders (most especially the ski resort town of Niseko). Moreover, the capital of Sapporo holds an annual Snow Festival where they feature large snow sculptures. Of course, Hokkaido doesn’t disappoint in spring and summer either with attractions like Kamiyubetsu Tulip Park, Furano lavender fields, Tenjin Wisteria, Sapporo Lilac Festival, and more.
★ Niigata: This is a prefecture within Chubu or Central Japan and it is one of the country’s top culinary and getaway hotspots. I went on a travel spree here before and I loved my stay! To see a complete itinerary guide, see here.
Nagoya: Also found within the Chubu region is Nagoya which is known for its towering castle. Other notable sites are as follows: Korankei, City Science Museum, Atsuta Shrine, and Railway Museum. For food, check out Sekai no Yamachan, a famous izakaya (Japanese pub) in the city that serves flavorful “legendary chicken wings”. .
Kanazawa: This is the capital of the Ishikawa prefecture and it boasts historical attractions as well as its ‘Kenrokuen‘ — said to be one of the 3 best landscape gardens in Japan. .
Kiso Valley: Nestled within Nagano prefecture is this valley that holds an ancient 70km trade route called Kisoji which was later on combined with other routes forming the 500km long Nakasendo. Today, nearby post towns of Magome, Tsumago, and Narai are flocked by visitors not only to hike through the Nakasendo but to also revel in the traditional stone paths and wooden buildings of these quaint towns. Truly an interesting addition to your Japan itinerary! .
Matsumoto: One of Japan’s finest cosmopolitan cities that still have that rural feel. Rest assured, this is the kind of place that can keep you occupied, what with its stunning castle, captivating districts, and enchanting vistas.
★ Shirakawa-go: There is no shortage of picturesque traditional villages in Japan and some of the best of them all would be the UNESCO World Heritage Sites of Shirakawa-gō and Gokayama.
★ Takayama: If you’re looking for a thoroughly old and authentic traditional Japanese village, traveling to the city of Takayama in Gifu Prefecture is a must. Truth be told, due to its well-preserved antiquity, it has earned the title of being Japan’s “Little Kyoto” — a title which I agree with!
Tateyama Kurobe Alpine Route: If you’re up for incredible and unique nature activities in Japan, it’s a MUST to visit the stunning mountain sightseeing route that’s commonly referred to as the “Roof of Japan”. A crowd favorite as of late is its grand ‘Snow Wall’ that’s open from mid-April to late June! For more info, read here. .
★ Yamanouchi: This is a municipality in Nagano prefecture that has the below notable attractions…
Jigokudani Monkey Park: Have you ever seen those adorable photos online of monkeys bathing in a natural onsen (hot spring)? Well, this is the place where you can find them! The monkeys are called Japanese Macaques or ‘Snow Monkeys’ and they are very accustomed to humans so you can watch them play up close in this park (which is their natural habitat). The park is open all year but if you want the best photos of the monkeys, come from January to February when the park is covered in blinding white snow and the monkeys come bathing in the hot spring.
Shibu Onsen: An old-fashioned hot spring town
Shiga Kogen Resort: The largest ski resort in Japan.
Wanna see cute and fluffy foxes? Then go and visit the famous fox village in Miyagi Zao’s city of Shiroishi for your Japan itinerary! . Check out this blog post to find out more: The Fluffiest Place on Eart: Miyagi Zao Fox Village!
– – –
SOUTH OF JAPAN.
★ Kinosaki: Located about 3 hours away from Kyoto, this is a pleasant onsen town that has a great atmosphere. I stayed here before for 2 nights and I loved strolling around the town in my yukata and geta (wooden clogs), feeling like a local! After all, everyone (locals and foreigners alike) who visit the town almost always wears the same attire when going about the place onward to the public baths. .
★ Okinawa: As Japan’s southernmost prefecture, this is often a choice destination for locals during the summer due to its abundant marine wildlife, pristine beaches, and beautiful coral reefs. Consequently, snorkeling and scuba diving are the top main activities when on these islands.
Himeji: This place is most famous for its Himeji Castle which is typically considered to be Japan’s most beautiful surviving feudal castle. Because of this, it is both a UNESCO World Heritage Site and a national treasure that you must see for your Japan itinerary. .
Kobe: As the capital of Hyogo prefecture, I guess the first thing that pops into your mind now is the popular mouth-watering Kobe beef, a famous local brand of wagyu (Japanese beef) meat. Truth be told, you can eat Kobe beef in any restaurant around Japan that is accredited to sell it so you don’t necessarily need to go to this place — however, if you’re a true aficionado, this place is great to see! Either way, as a port city, Kobe is well-liked not only for its tasty local beef but also for its sake breweries, Mount Rokko, Chinatown, Harborland, and more.


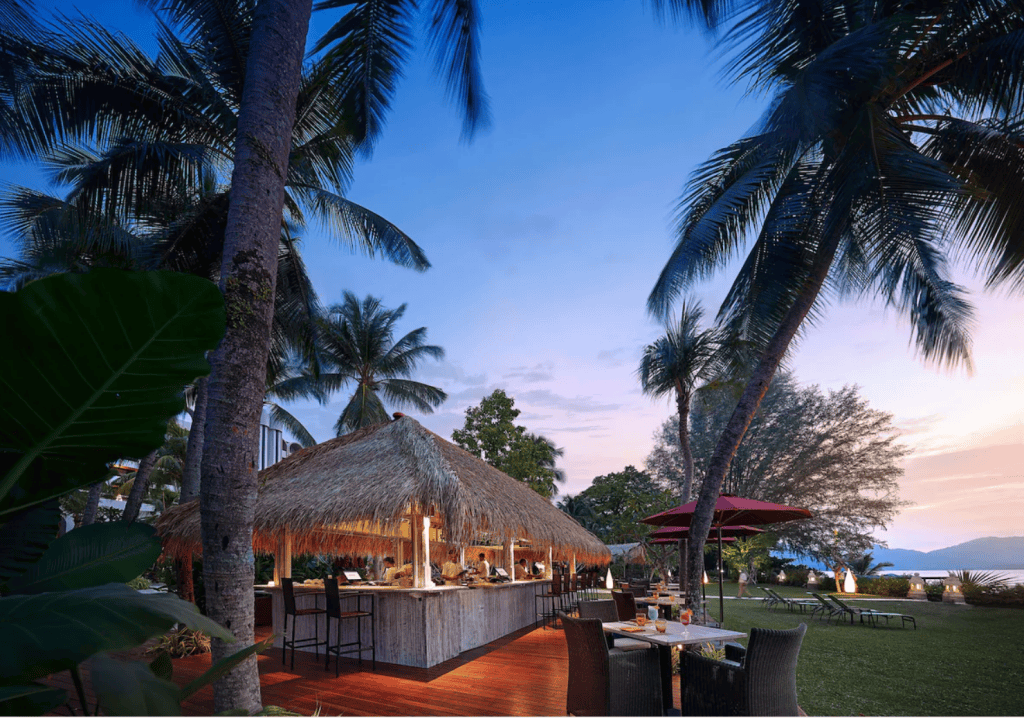
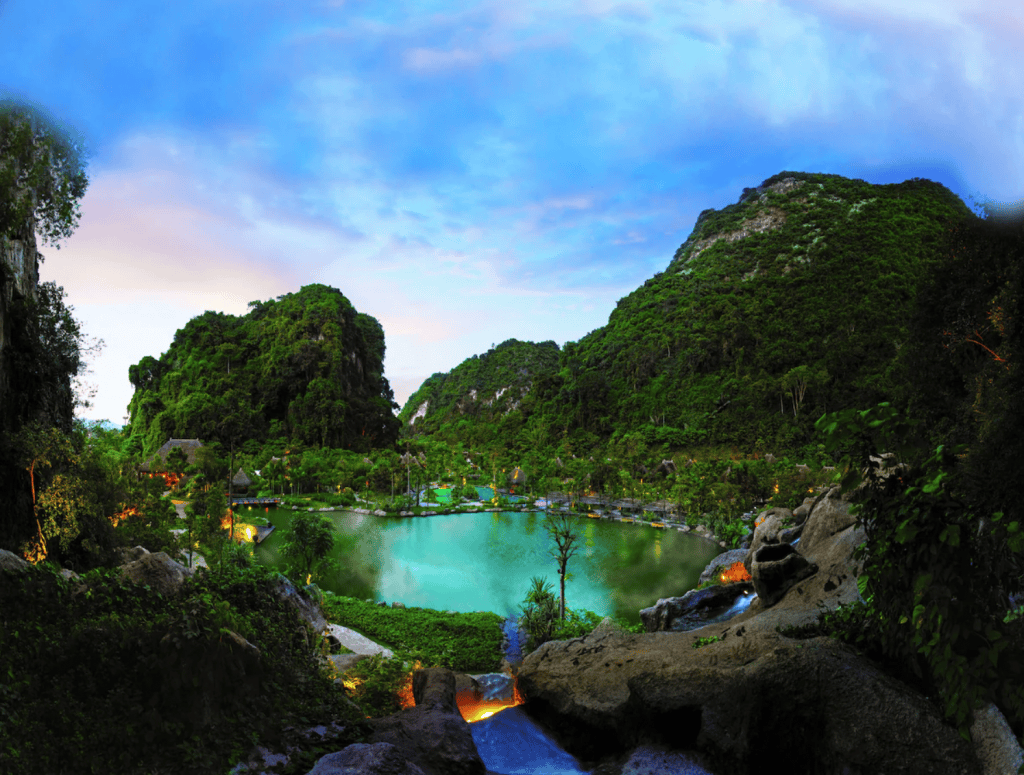


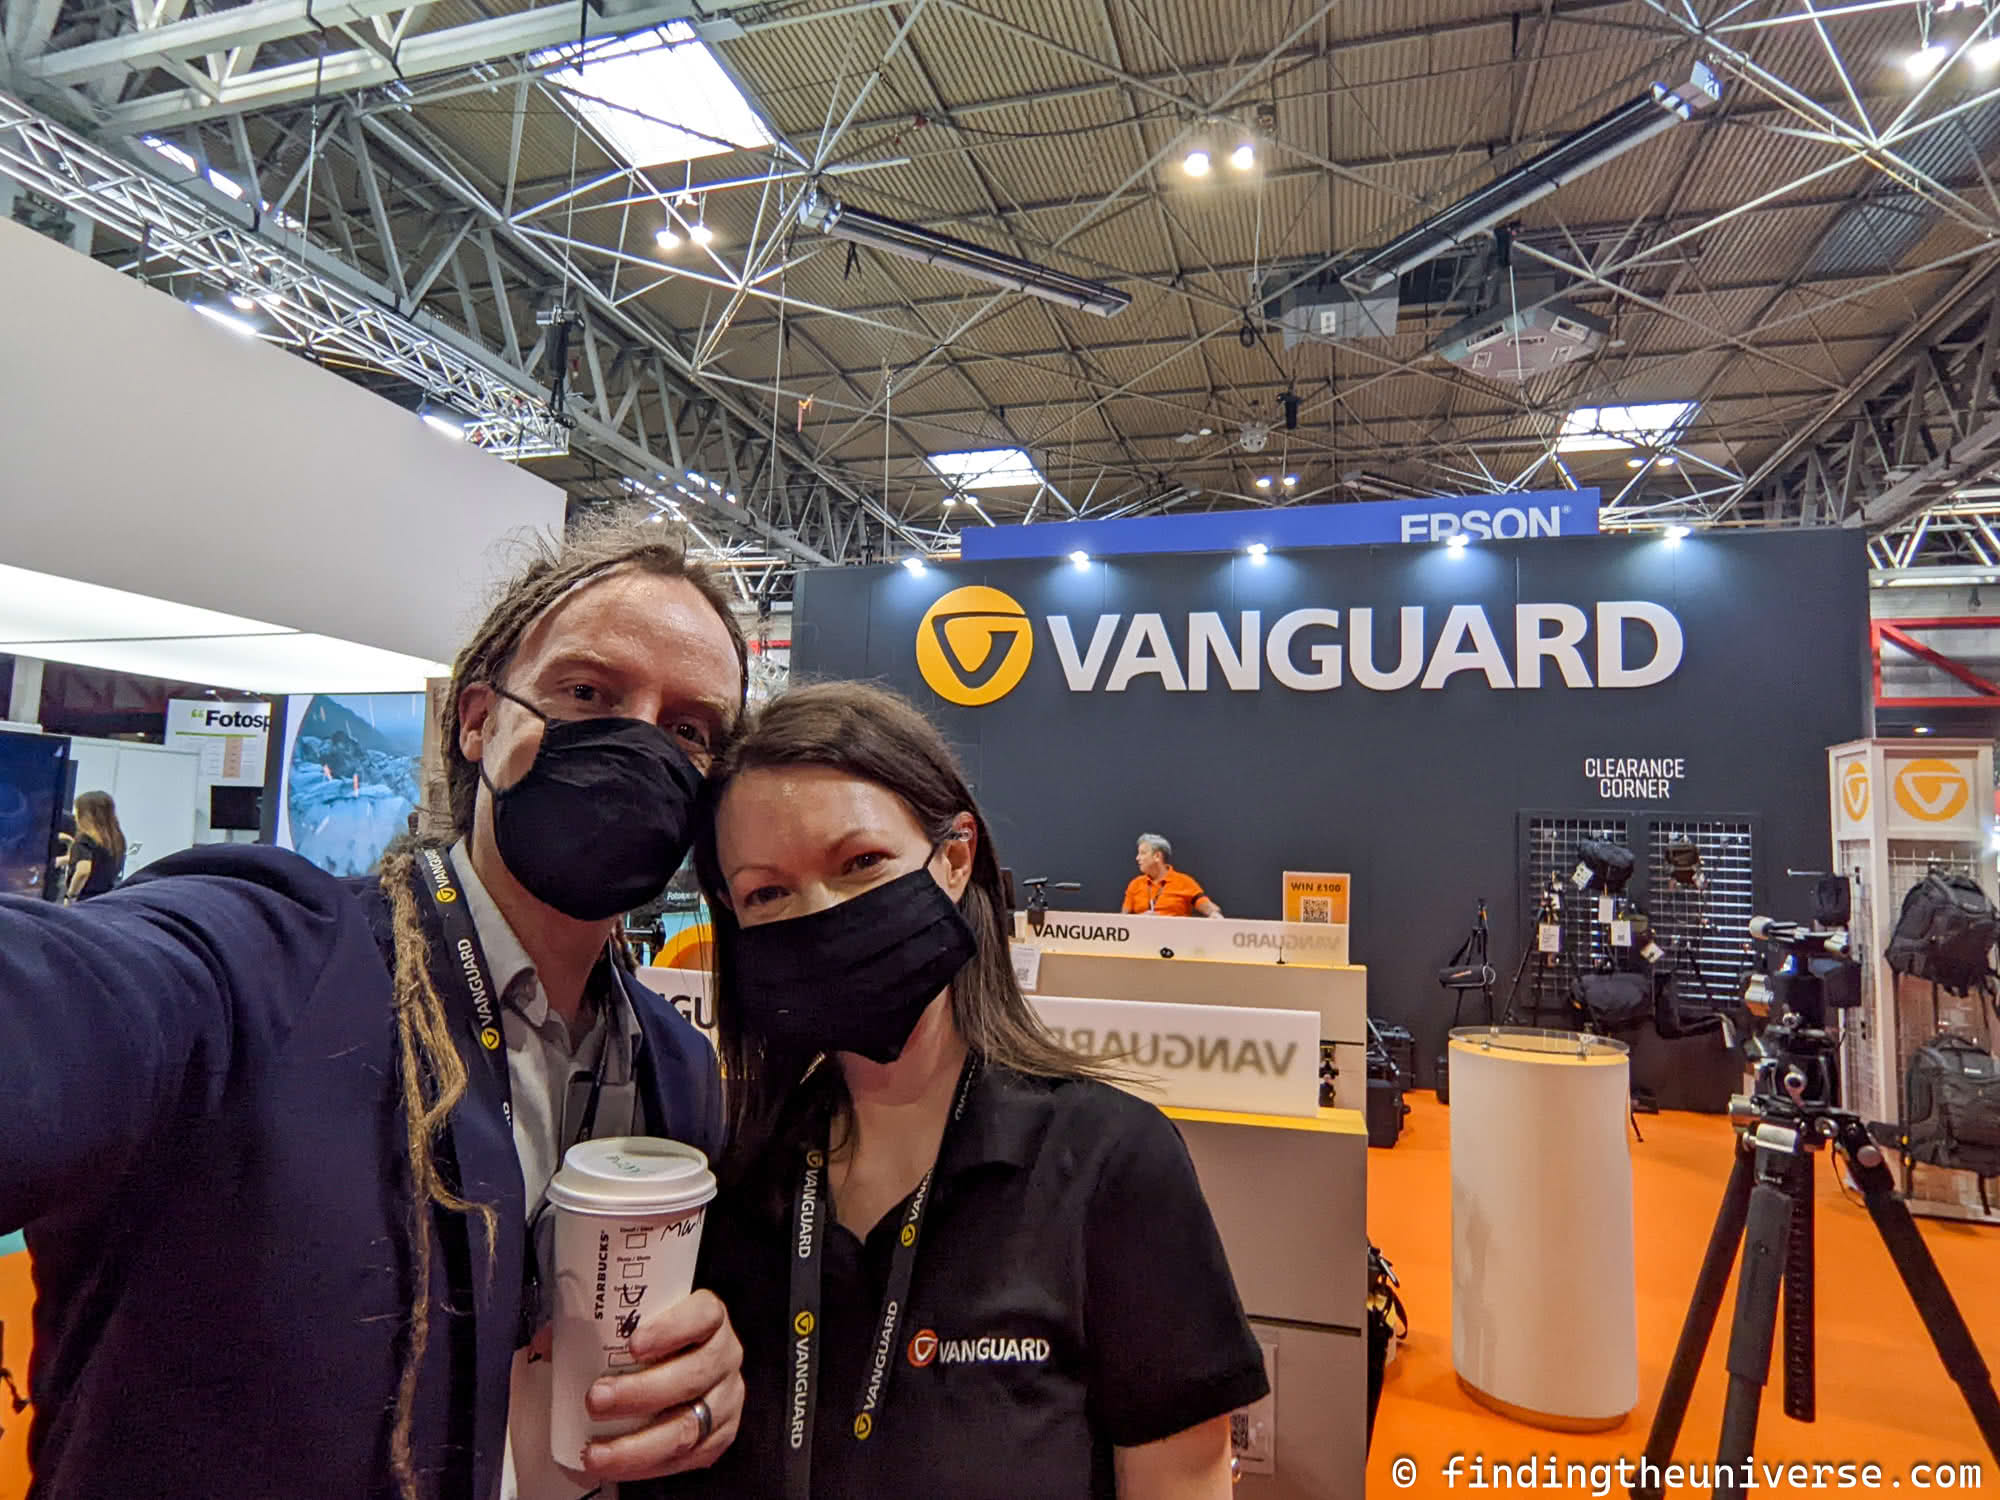
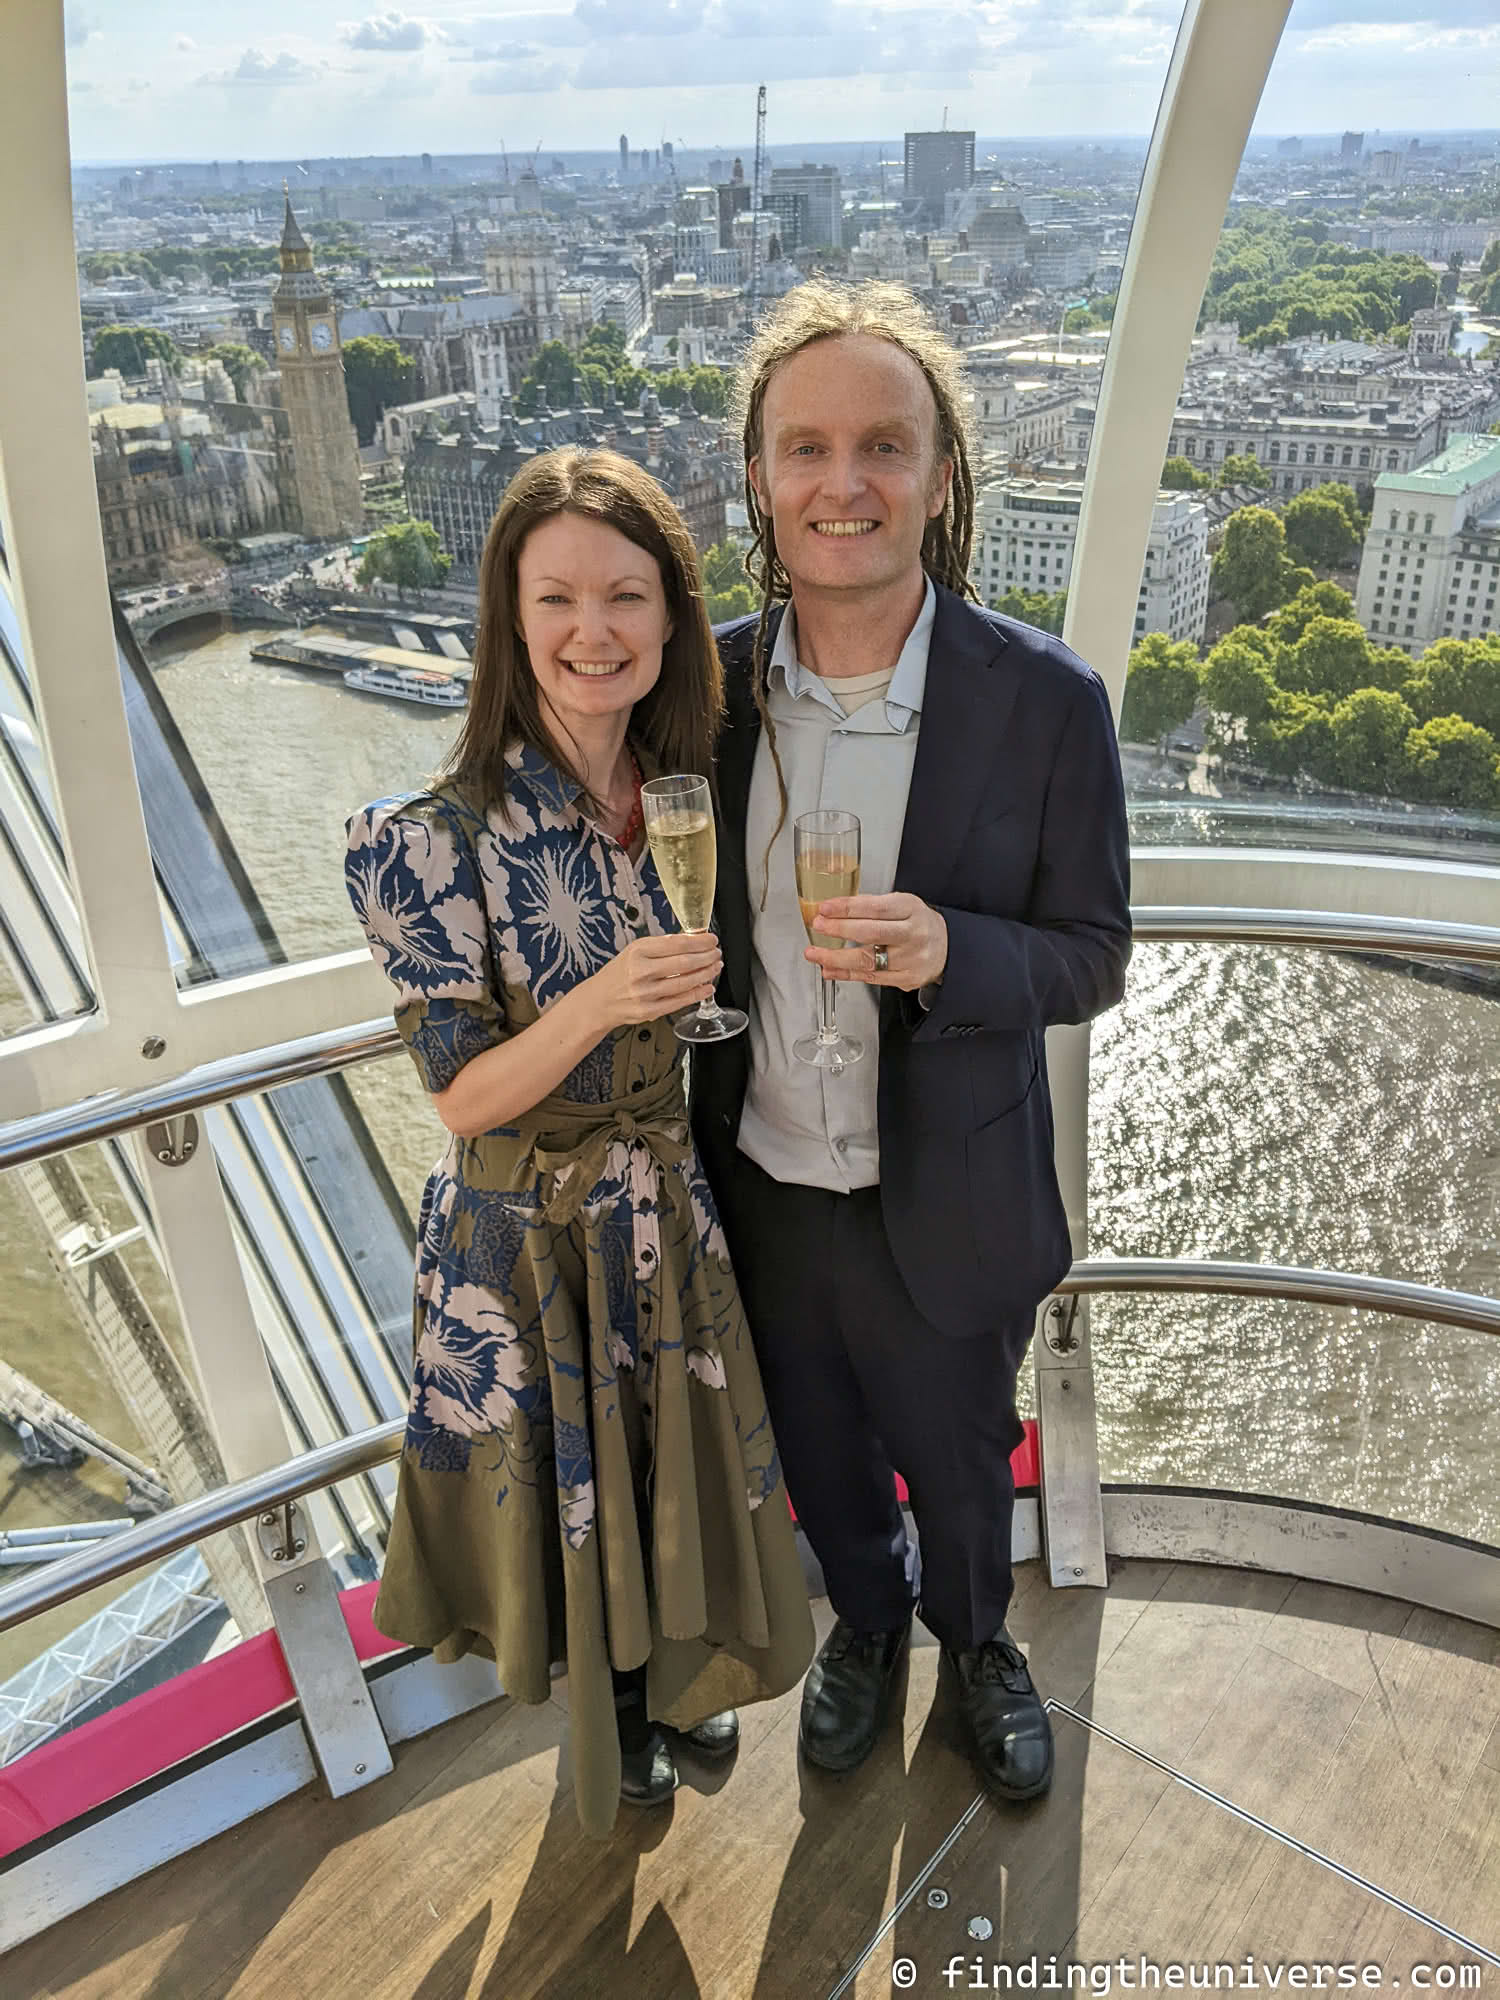
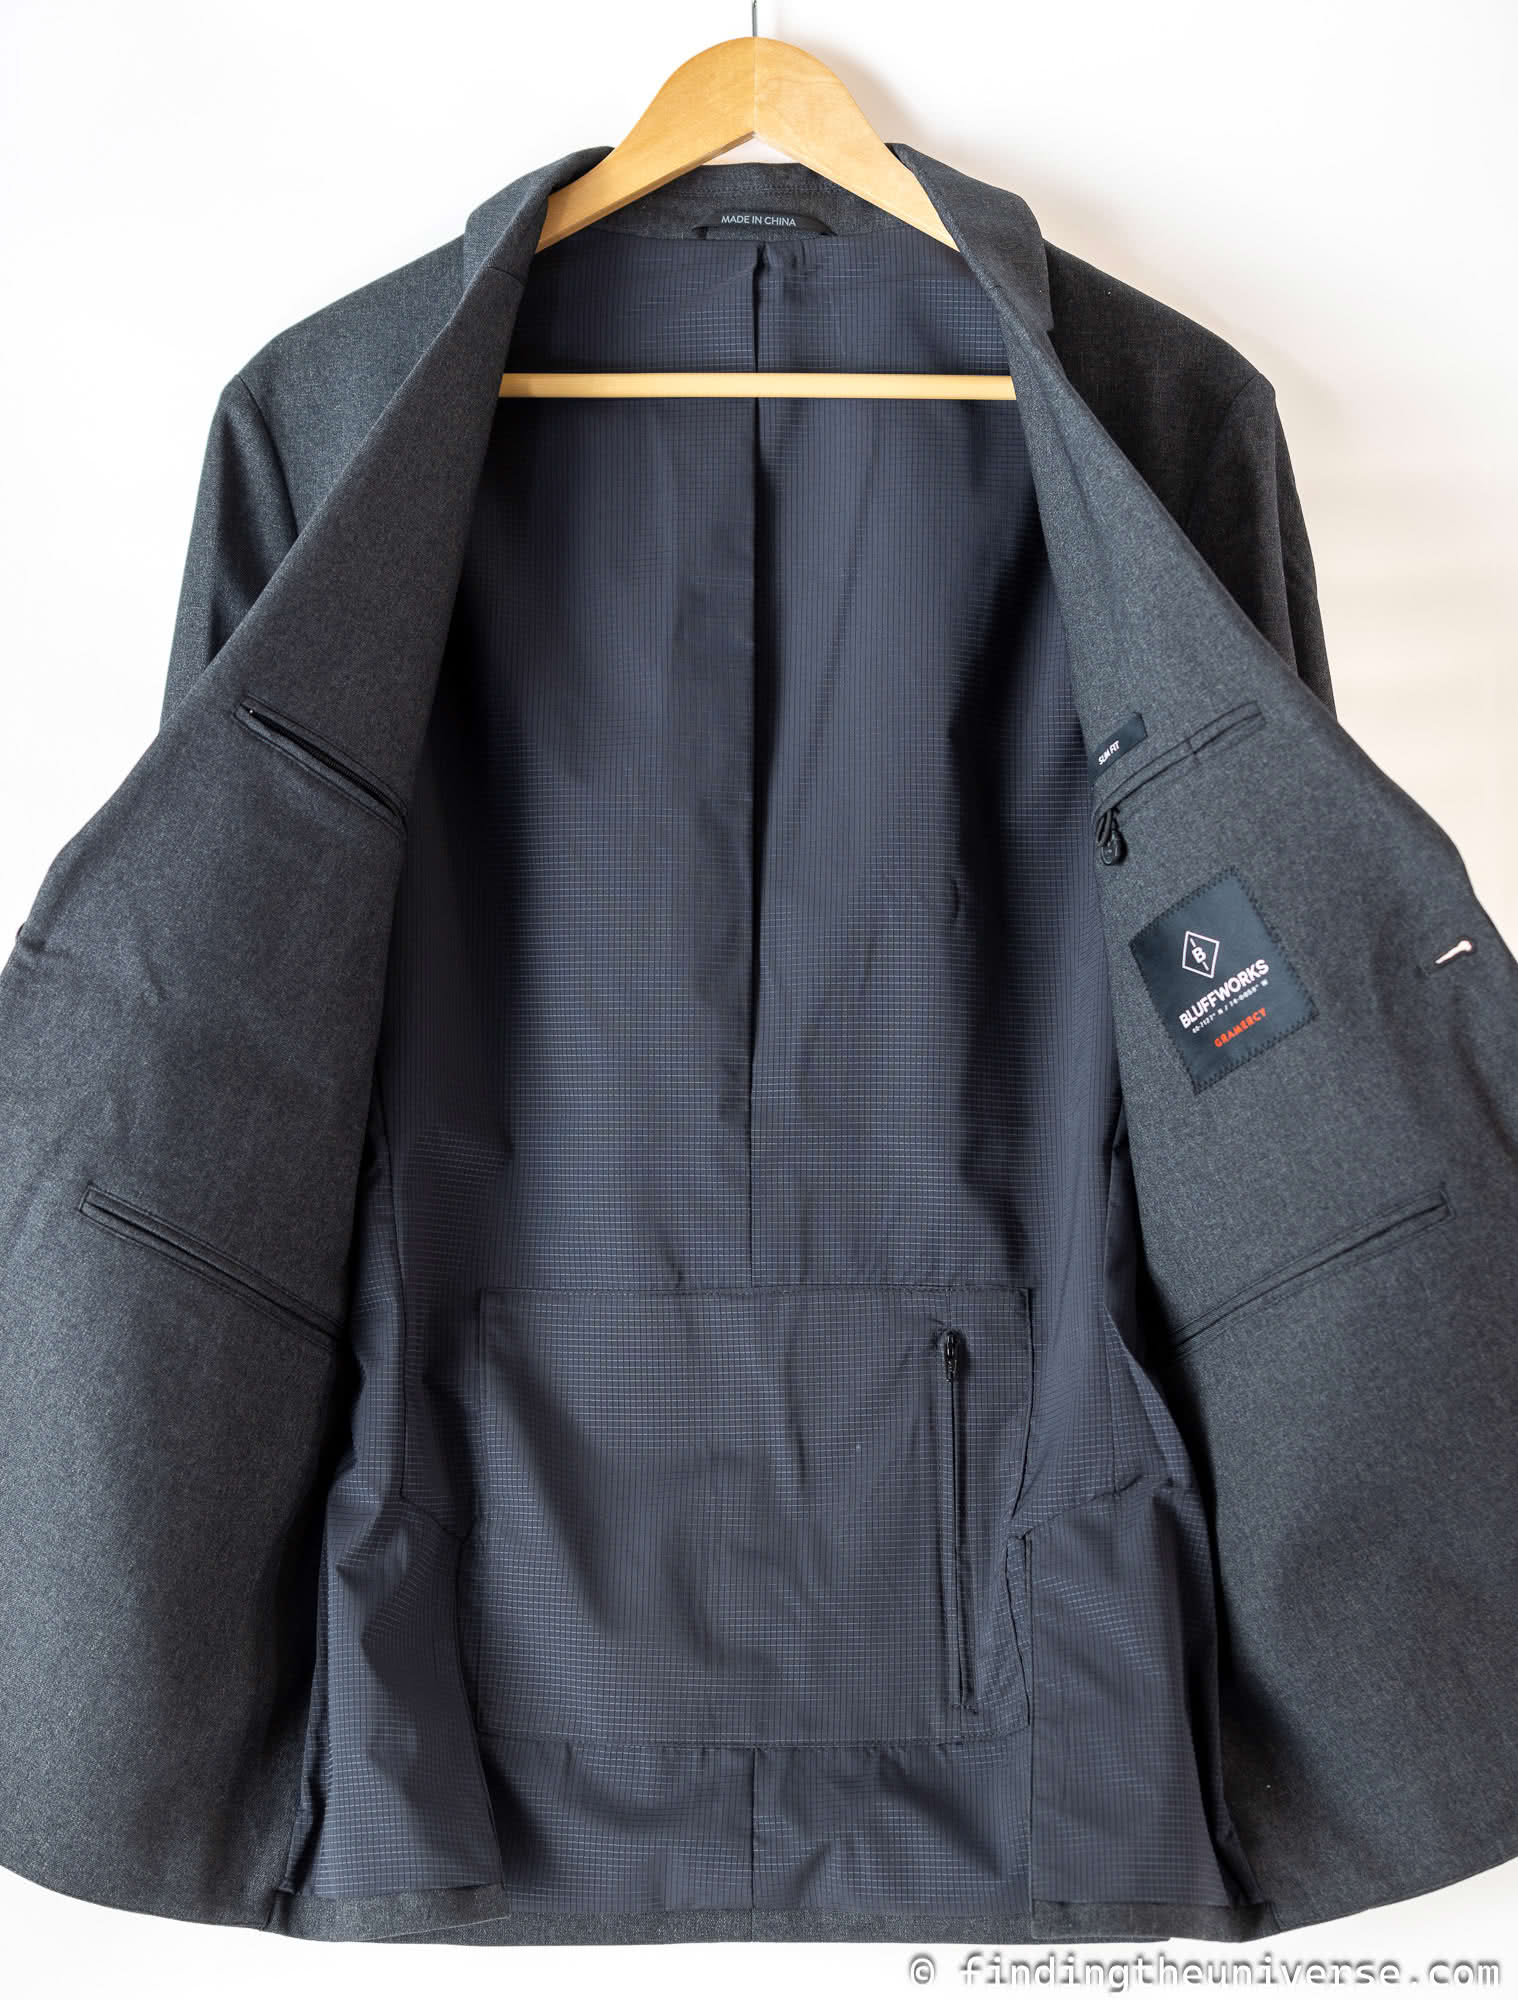


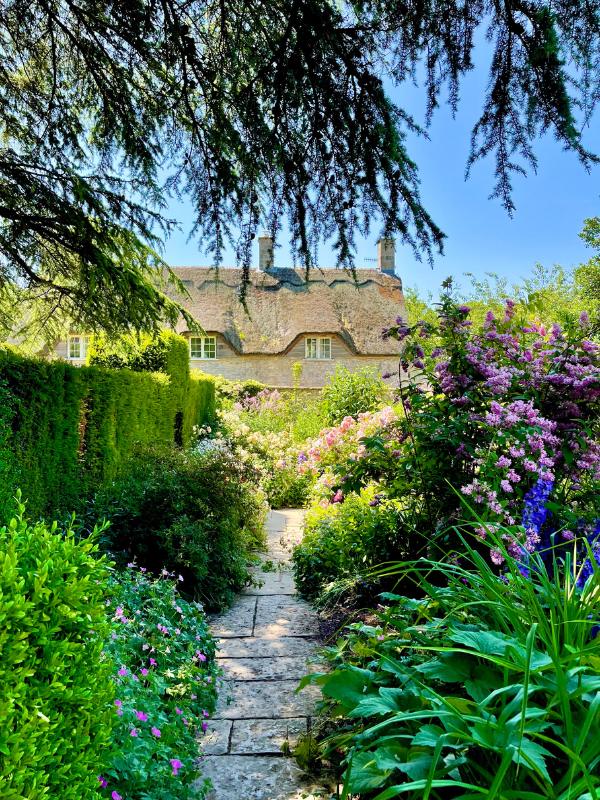
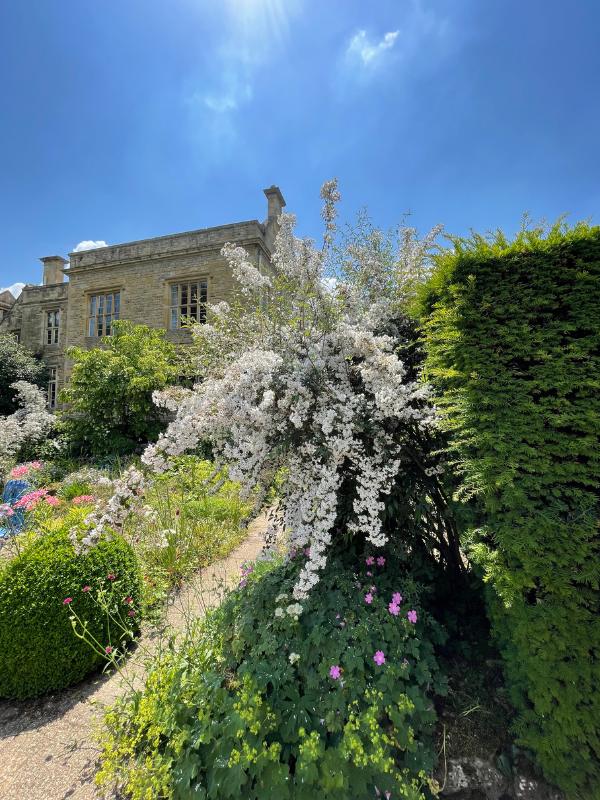
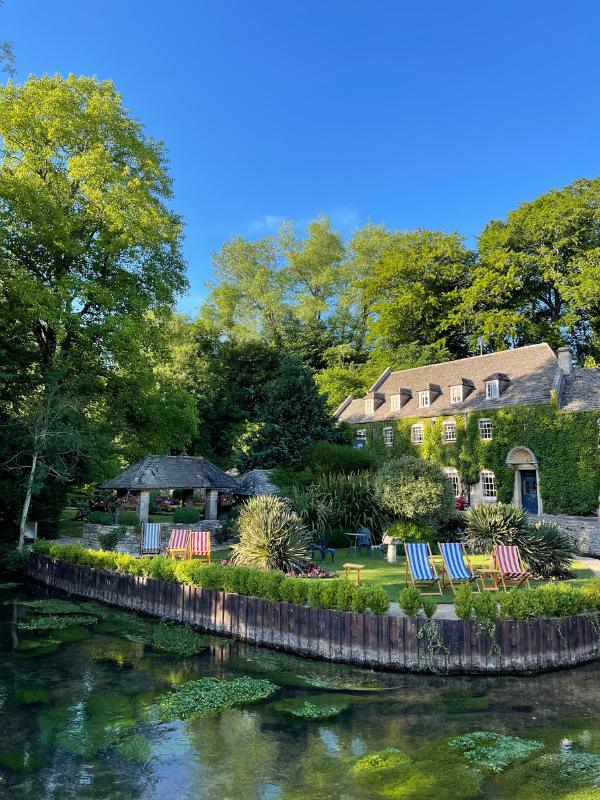
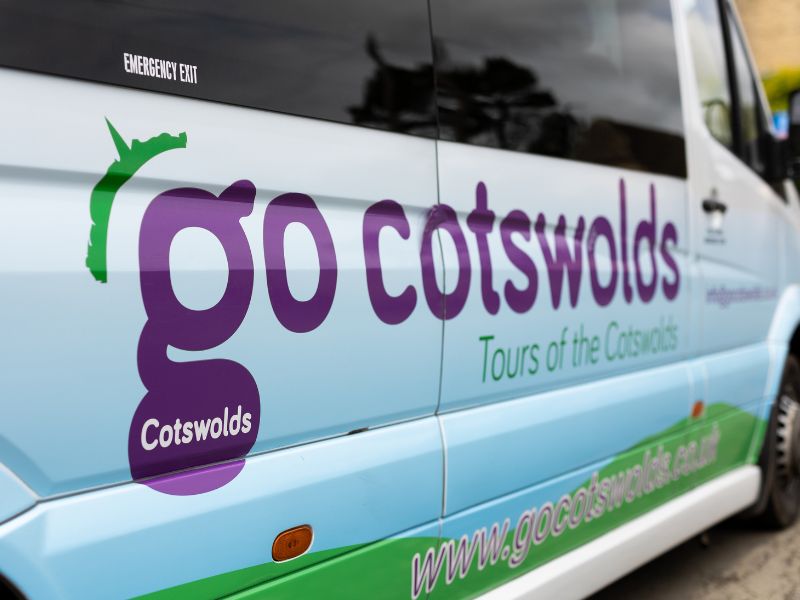


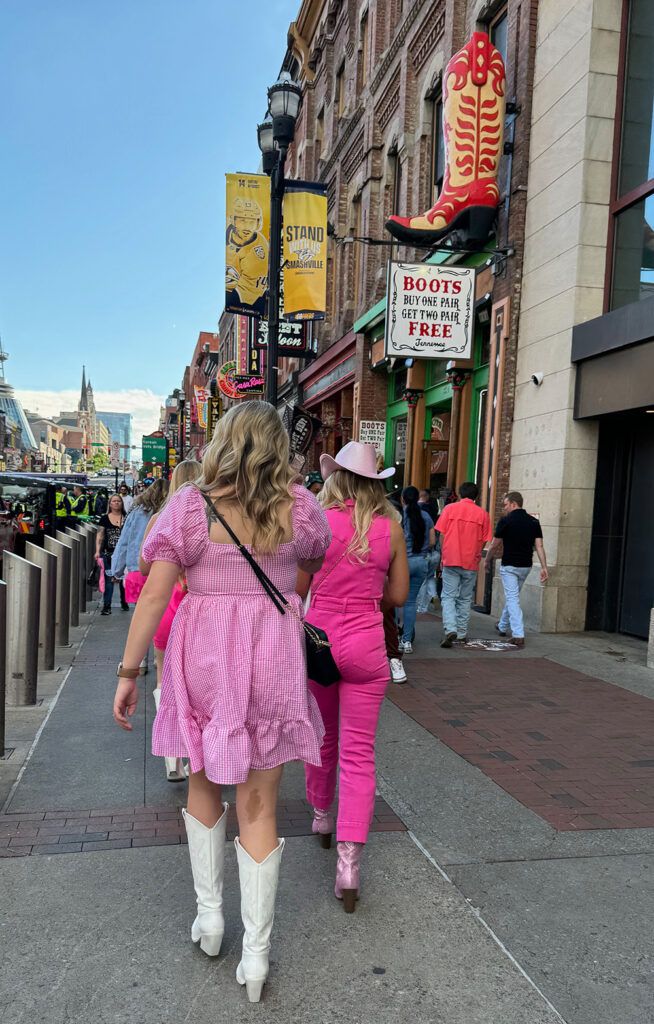
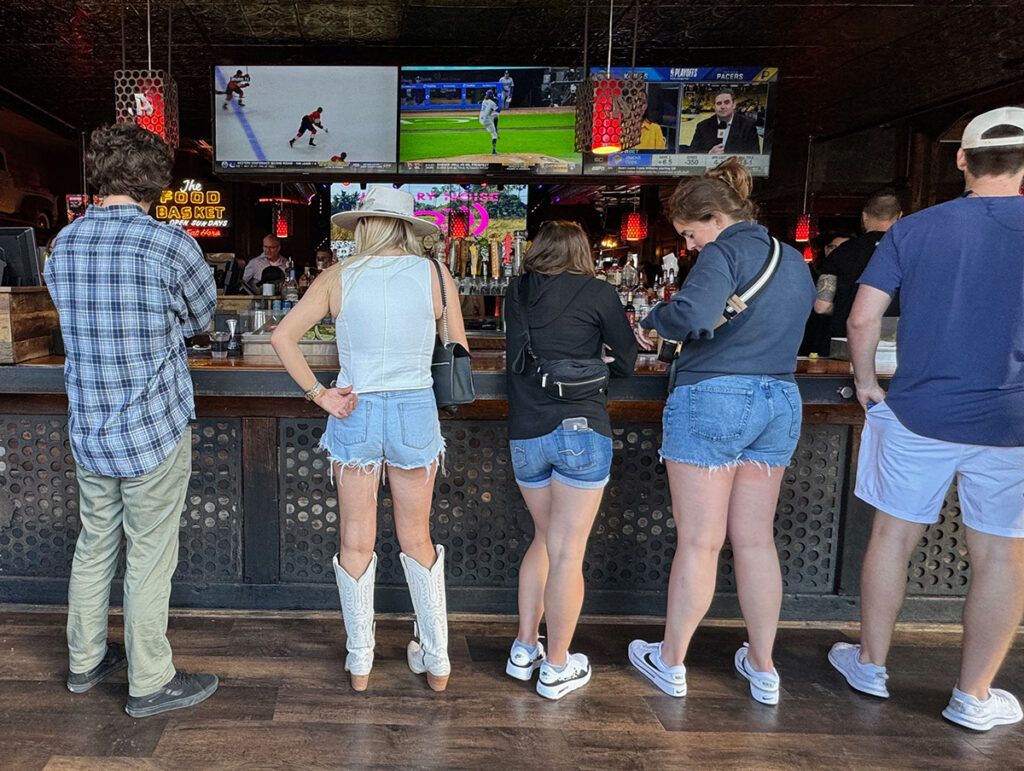
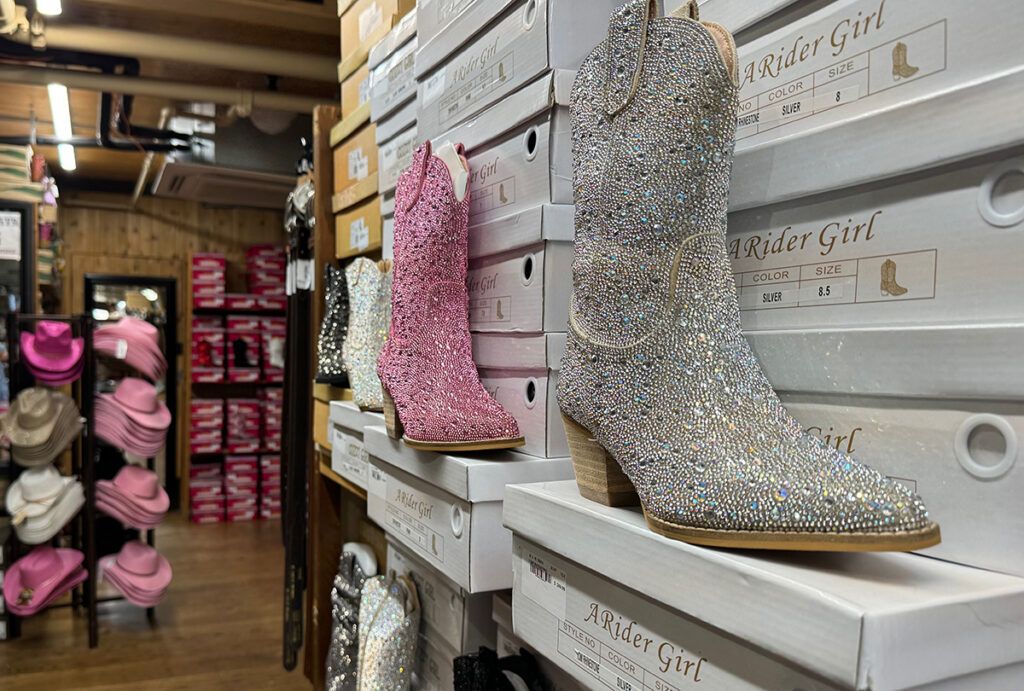
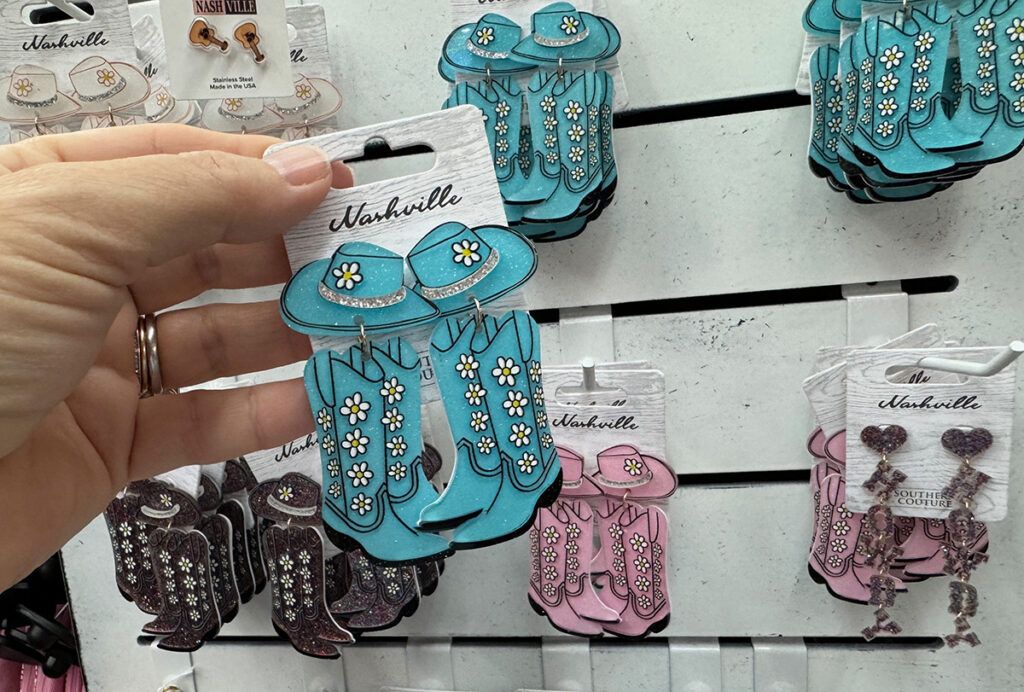


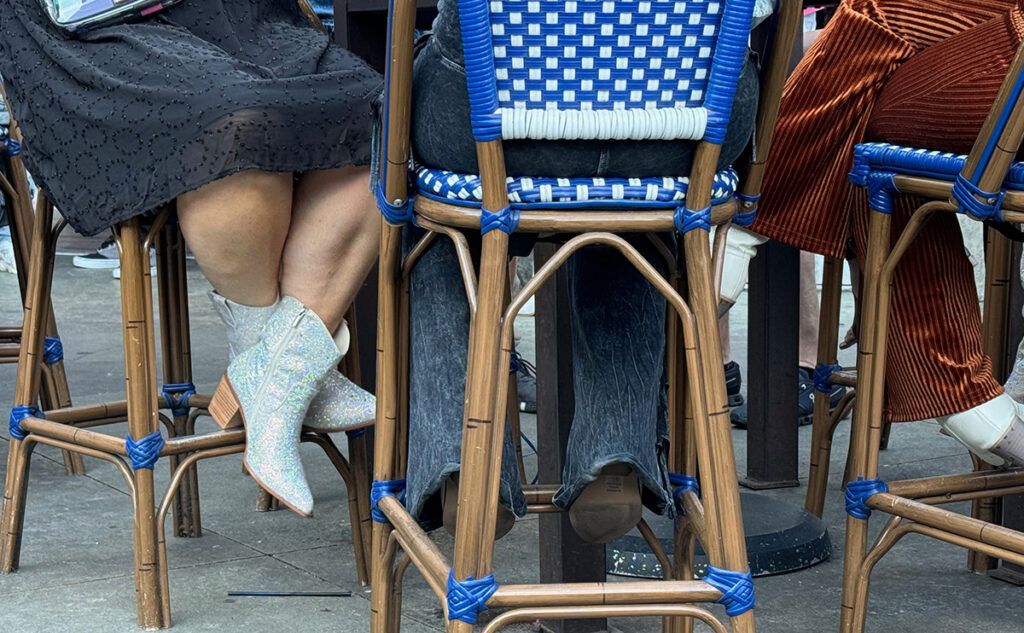
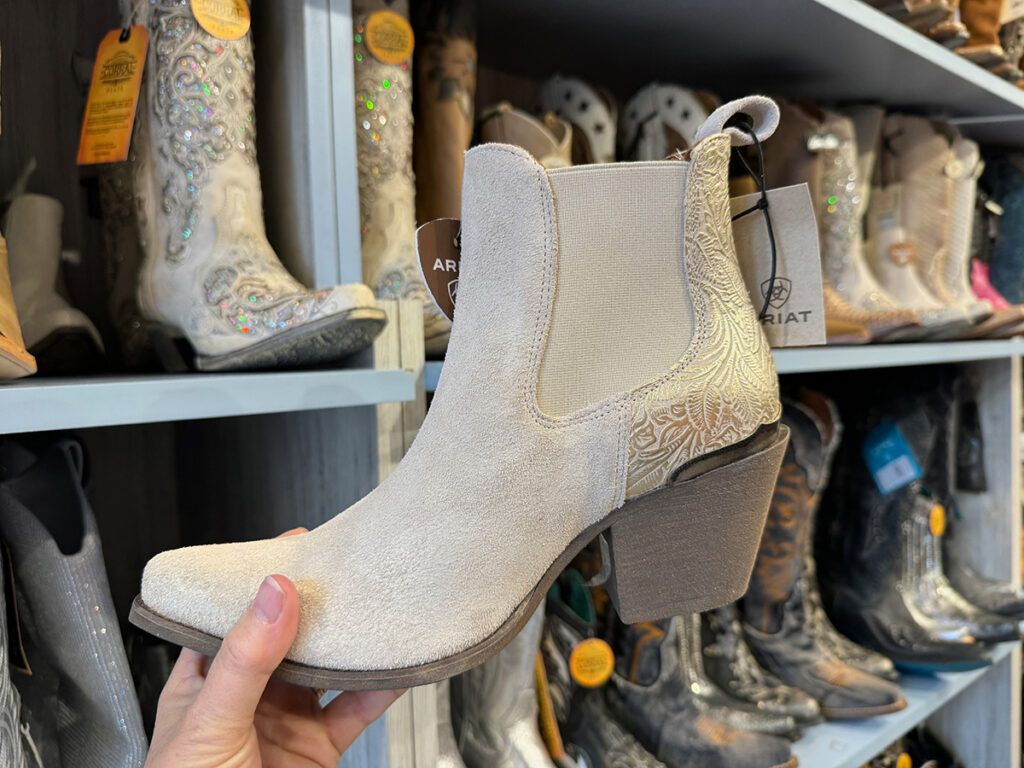


")